In this chapter, we're going to deploy a first version of our contracts to the test network so that we can interact with them from our web app using the Web3 library.
Running migrations
In your Truffle project, run the following command:
truffle migrateThis will compile and upload the contracts to your local Ethereum network.
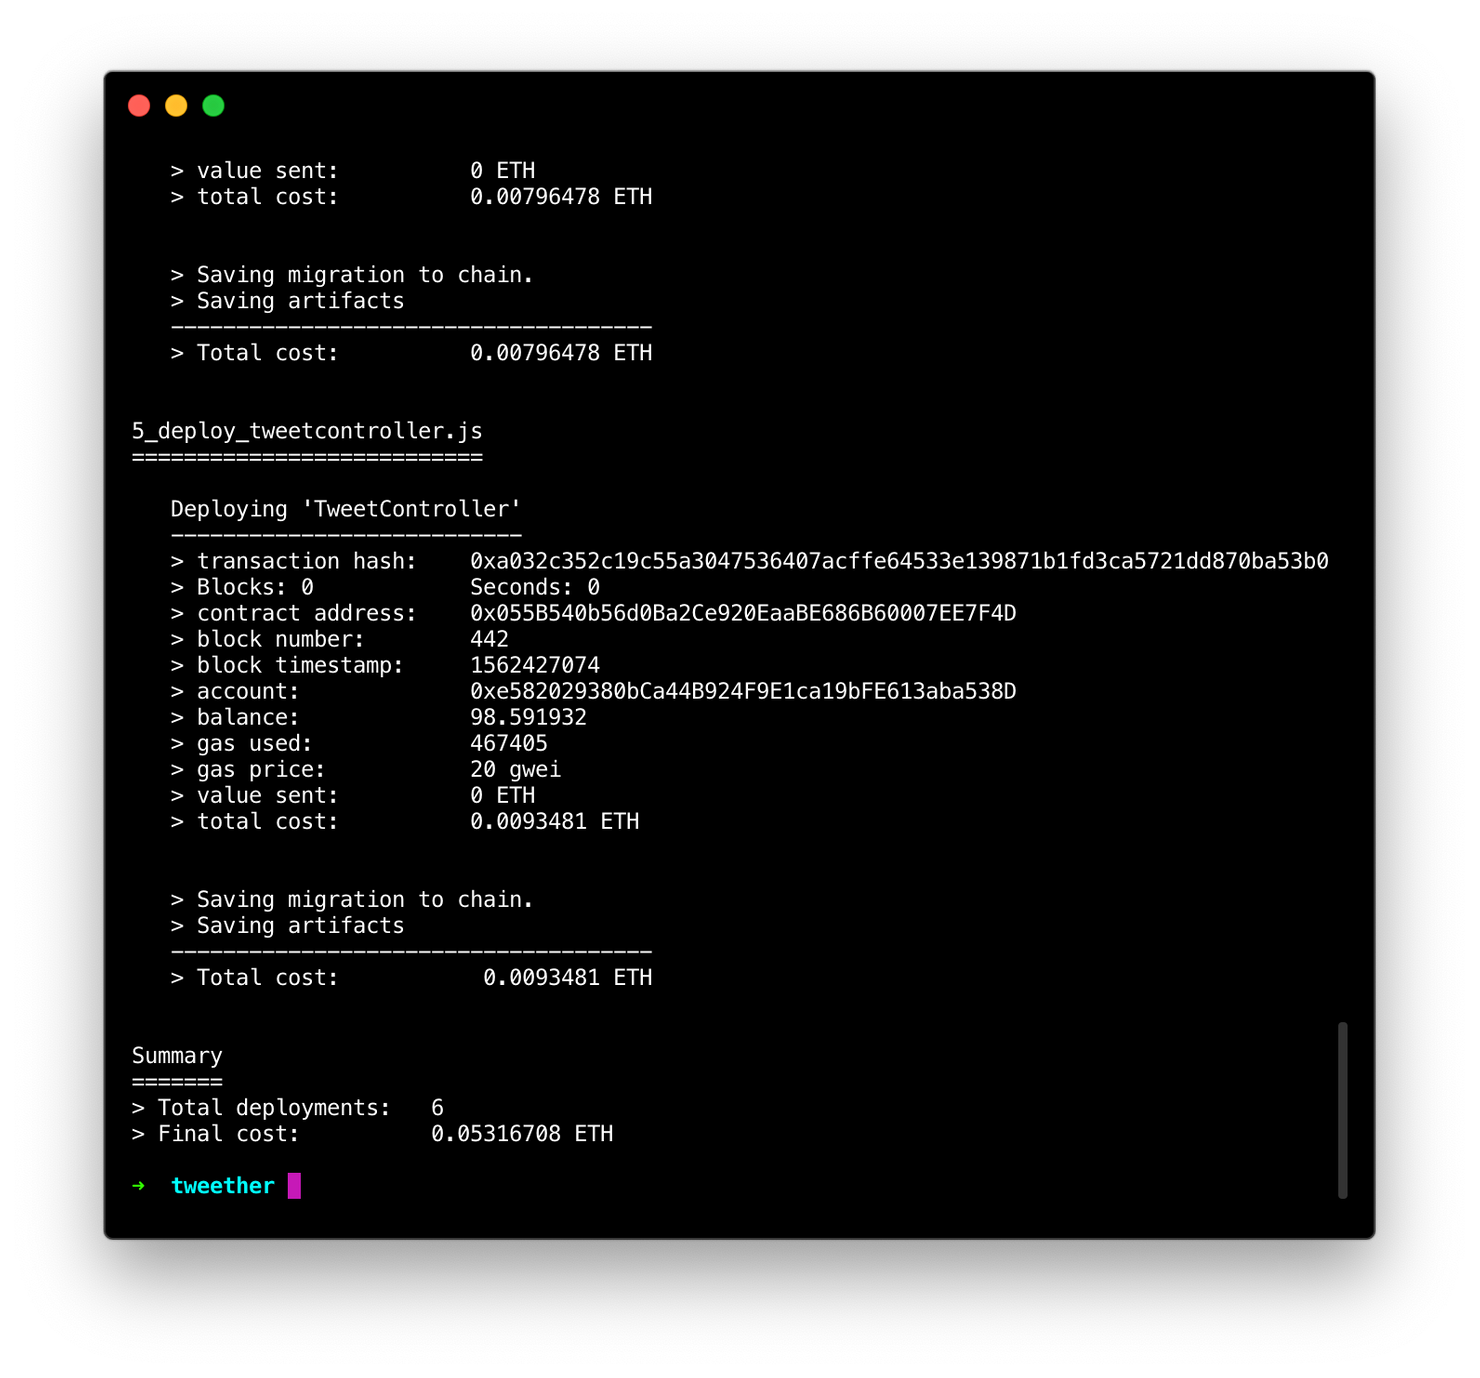
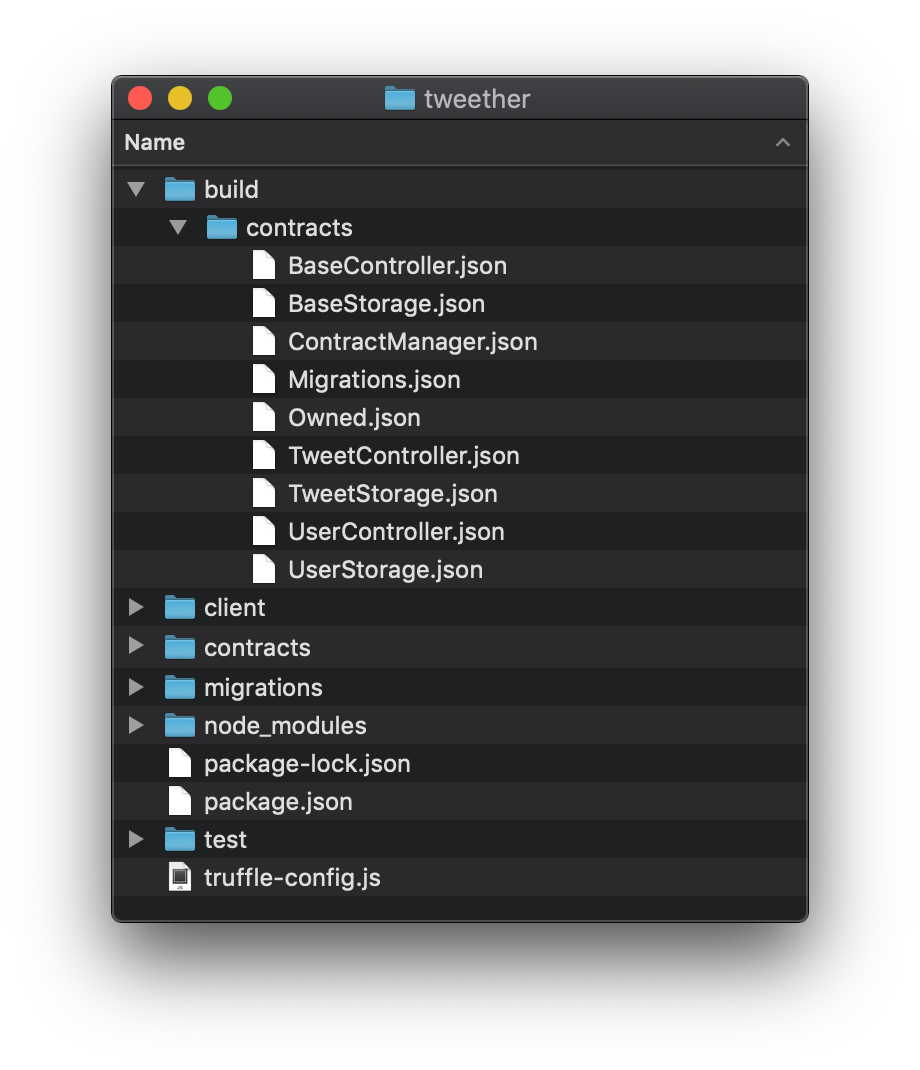
After the migration, you'll notice that there's a new build folder in your Truffle project. In it, there's a contracts folder with your contract artifacts.
These files serve as a bridge between the web app and the deployed contract that they each represent, as we'll see soon.
Calling the contract
In order to use the artifacts in our app, we need to import them somehow. Thankfully, Next allows us to import JSON files without the need for any special conversion. The only caveat in our case it that the artifact files are currently outside the Next project folder (since build/contracts is outside of client). Therefore, we need to copy them into the web project!
To automate this process, we will add a new script called artifacts in our package.json file, whose task is to copy the entire build/contracts folder into a new one called client/web3/artifacts.
We'll also alter our dev command so that it always runs npm run artifacts before starting the server, just in case we forget to run it ourself.
// package.json

{
  // ...

  "scripts": {
    "dev": "npm run artifacts && next client",
    "artifacts": "cp -r ./build/contracts/ ./client/web3/artifacts",
    "test": "echo \"Error: no test specified\" && exit 1"
  },

  // ...
}
npm run artifacts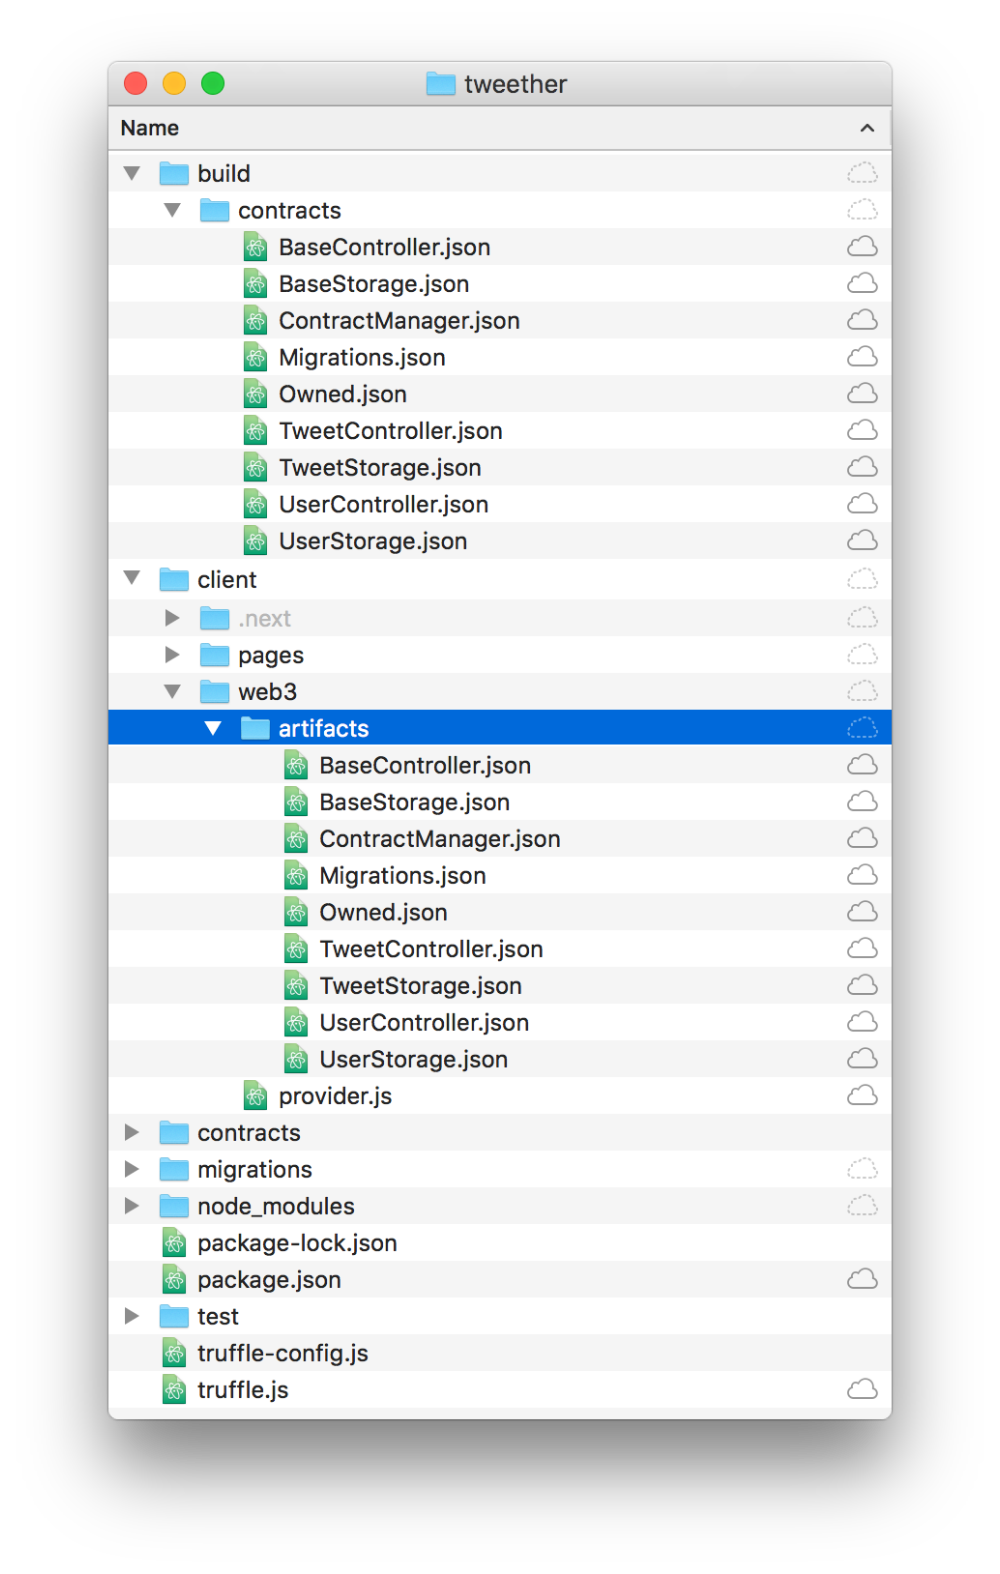 Voila! After running the command, you should have an exact copy of all your JSON files in the new "artifacts" folder.
Now we can import one of our artifact files, say UserStorage.json, into our index page and log its content!
// client/pages/index.js
// ...
// Add this row:
import UserStorage from "../web3/artifacts/UserStorage.json"
export default class IndexPage extends React.Component {
async componentDidMount() {
// ...
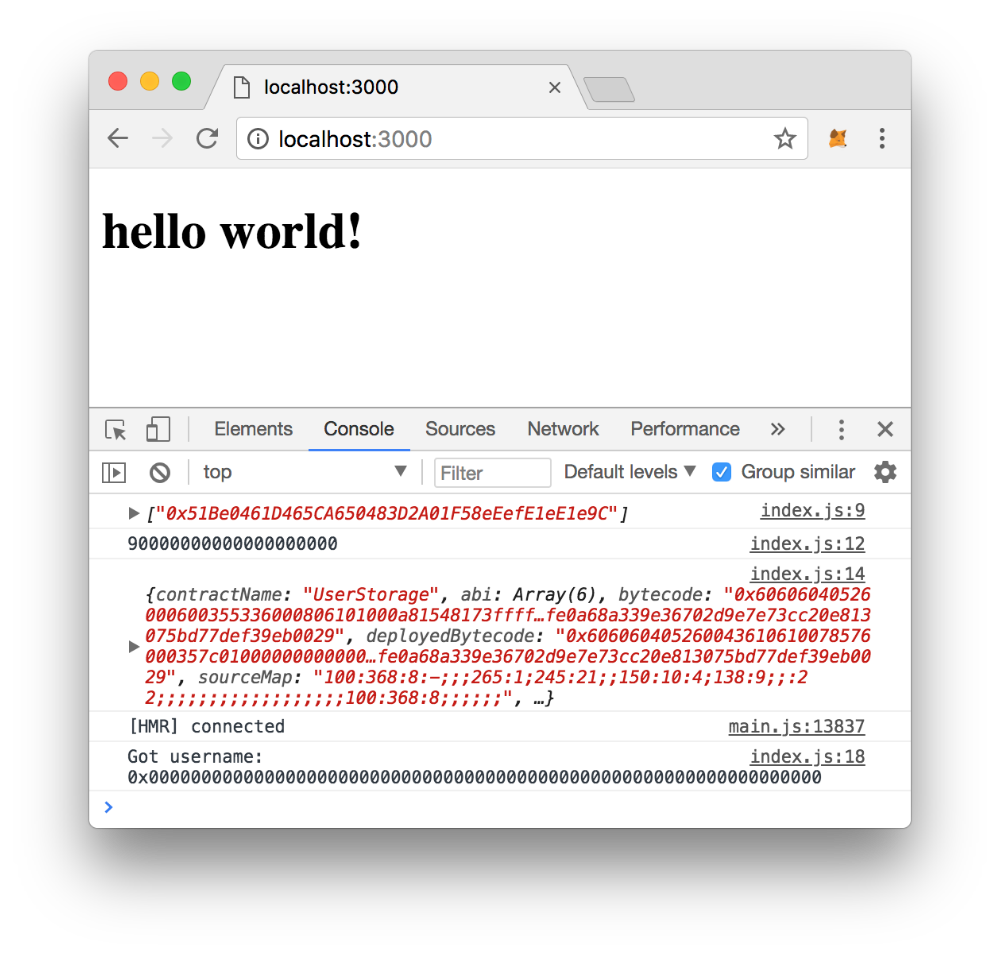
console.log(UserStorage) // <-- And this:
}
// ...
}While running the app with npm run dev, you should see the following in your browser's JavaScript console:
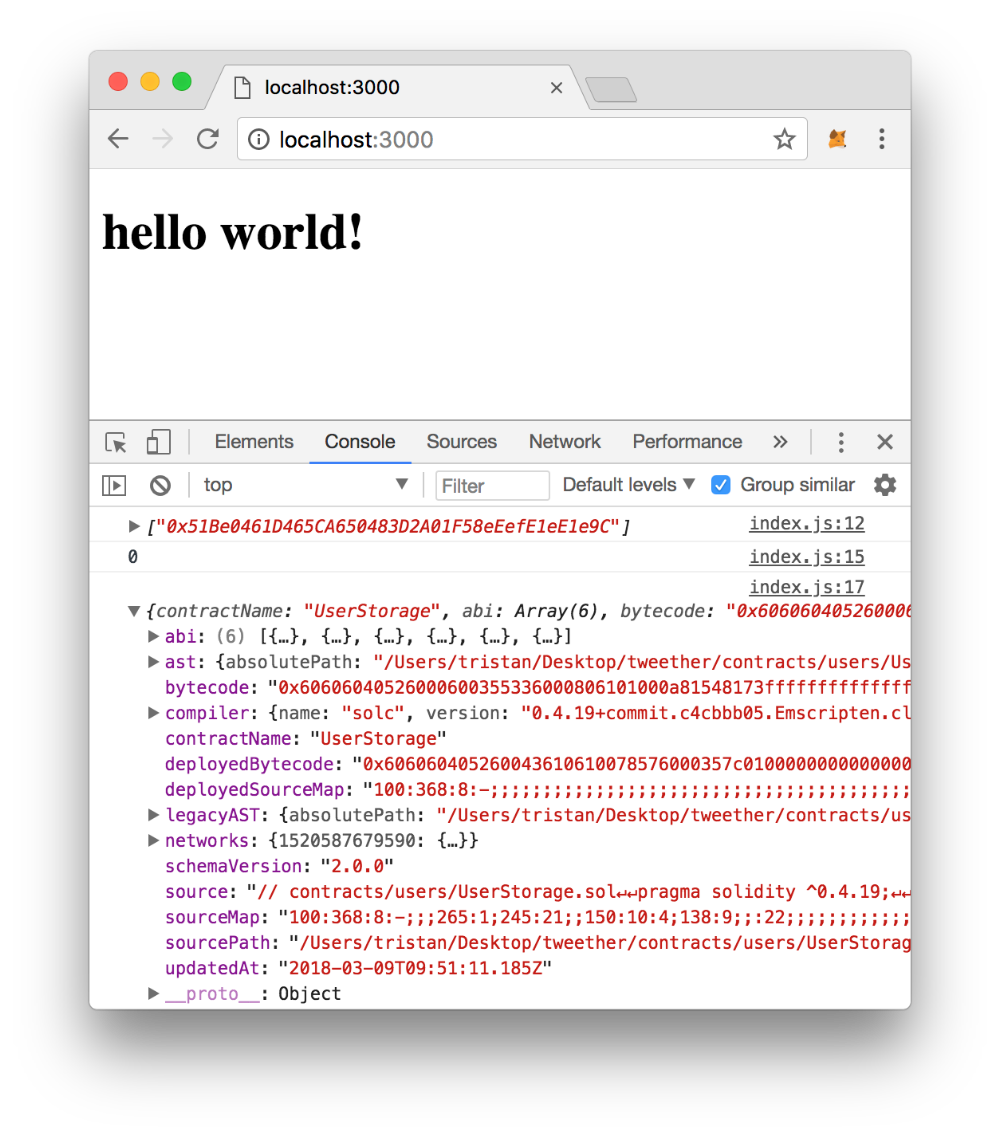 That's our JSON data!
Now, in order to actually **call one of the functions **in the contract, we'll need to convert this JSON data into some kind of contract object, just like we did in the earlier chapter "Running locally". For this, theres a great little library called truffle-contract.
npm install truffle-contract --saveIn our provider file, we create a new function called getInstance. It takes the artifact's JSON data as a parameter, converts it into a contract object using truffle-contract, and returns the last deployed instance.
// client/web3/provider.js

import contract from "truffle-contract"

// ...

export const getInstance = artifact => {
  const contractObj = contract(artifact)
  contractObj.setProvider(provider())

  return contractObj.deployed();
}
And we're done! This function can now be used anywhere in our web app to get an interactive version of any of our contracts. Let's try it out!
Going back to the index page file, we can now use getInstance on our JSON and then call the contract's profiles function to fetch the user with ID 11.
// client/pages/index.js
// Make sure you import "getInstance":
import { eth, getInstance } from "../web3/provider"
import UserStorage from "../web3/artifacts/UserStorage.json"
export default class IndexPage extends React.Component {
async componentDidMount() {
// ...
const storage = await getInstance(UserStorage)
const { username } = await storage.profiles.call(1)
console.log("Got username:", username)
}
// ...
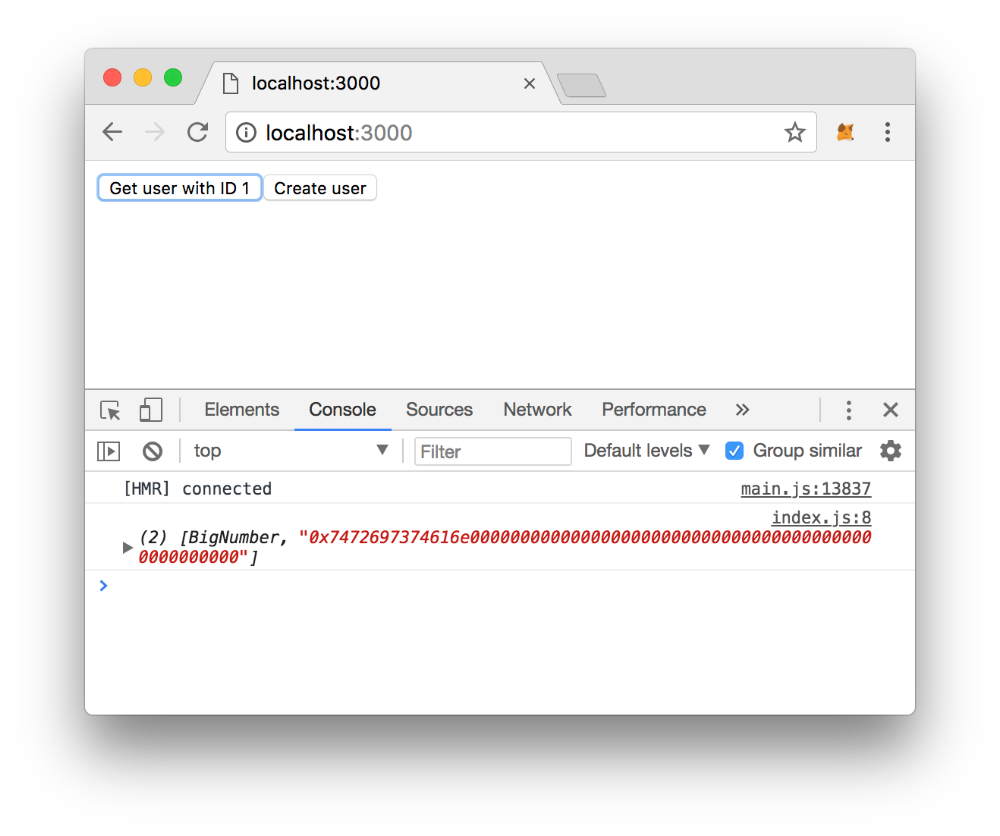
}Refresh your browser, and you should see the following:
 Its something! ¯_(ツ)_/¯
The reason we get an empty hex (0x000...) for the username is obviously because there's no user with ID 1 on our network yet. But at least it seems to work!
Abstracting the user functions
Now that we have some proof that we can interact with our contracts from the web, let's abstract some of this functionality away by creating functions for the most common operations. This will help us keep the app clean and simple.
First of all, we can create a special function for what we did above -- getting a user's info!
We create a new file (client/web3/users.js) that contains a getUserInfo function:
// client/web3/users.js

import { eth, getInstance } from './provider'

import UserStorage from "./artifacts/UserStorage.json"

export const getUserInfo = async (userId) => {
  const storage = await getInstance(UserStorage)
  const profile = await storage.profiles.call(userId)

  return profile
}
Then we'll rewrite the code in our index page so that we instead need to click a button in order to fetch and log the user info. You can remove all the code that's in the componentDidMount hook, as well as the imports at the top of the file.
// client/pages/index.js

import React from 'react'
import { getUserInfo } from "../web3/users"

export default class IndexPage extends React.Component {
  logUser = async () => {
    const userInfo = await getUserInfo(1)
    console.log(userInfo)
  }

  render() {
    return (
      <div>
        <button onClick={this.logUser}>
          Get user with ID 1
        </button>
      </div>
    )
  }
}
There we go! Easy peasy!
Next, we want another function called createUser which will call the UserController's function with the same name.
Remember that createUser is a writable function. This means that it costs gas to execute it, and we can't just use .call as we did with profiles.call(). Instead, we have to pass a second parameter specifying which address we want to pay from.
In this case, we know we can get the user's MetaMask addresses using eth.getAccounts(), so let's just select the first address that exists in that list.
// client/web3/users.js

// ...

import UserController from "./artifacts/UserController.json"

// ...

export const createUser = async (username) => {
  const controller = await getInstance(UserController)

  try {
    await ethereum.enable()
    const addresses = await eth.getAccounts()

    const result = await controller.createUser(
      eth.utils.fromAscii(username),
    {
      from: addresses[0],
    })

    return result
  } catch (err) {
    console.error("Err:", err)
  }
}
Then we add a button to our index page...
// client/pages/index.js
import { getUserInfo, createUser } from "../web3/users"
export default class IndexPage extends React.Component {
// ...
// Add this function:
createUser = async () => {
const tx = await createUser("tristan")
console.log(tx)
}
render() {
return (
<div>
<button onClick={this.logUser}>
Get user with ID 1
</button>
{/* ...and this button: */}
<button onClick={this.createUser}>
Create user
</button>
</div>
)
}
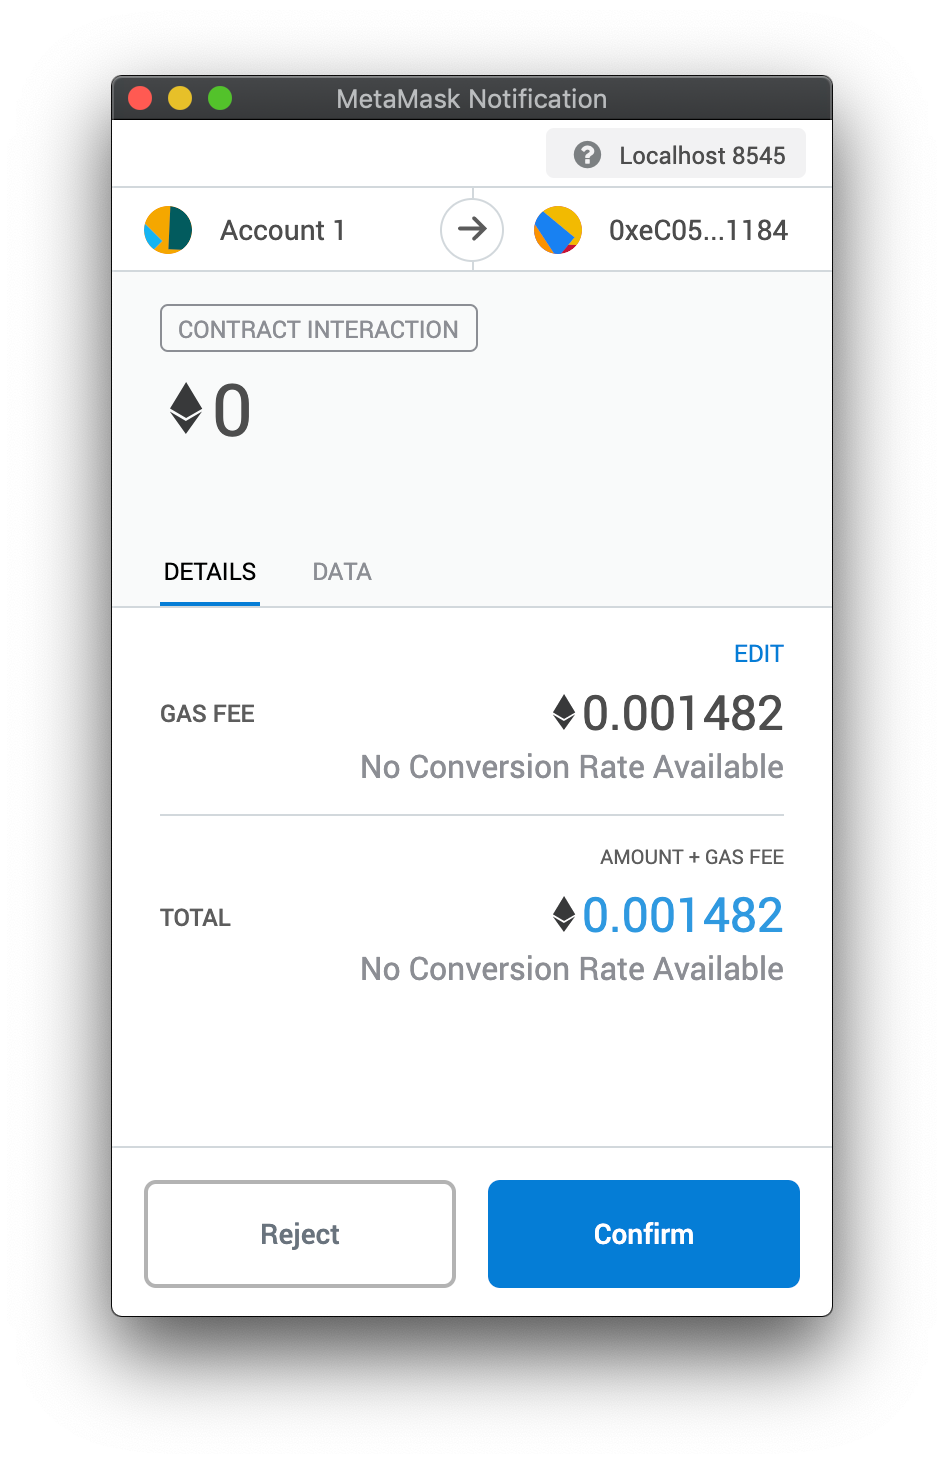
}After that, try clicking the button and you'll get to see the cool process of confirming a contract transaction through MetaMask!
Now that our first user is created on the network, you should be able to click the "Get user" button again and get your username in hex value!
It's a value! But not very readable...
To make it readable, we'll do just like we've done in our tests files -- use the toAscii function that's built into Web3.
// client/web3/users.js
// ...
export const getUserInfo = async (userId) => {
const storage = await getInstance(UserStorage)
const { id, username } = await storage.profiles.call(userId)
return {
id: parseInt(id),
username: eth.utils.toAscii(username),
}
}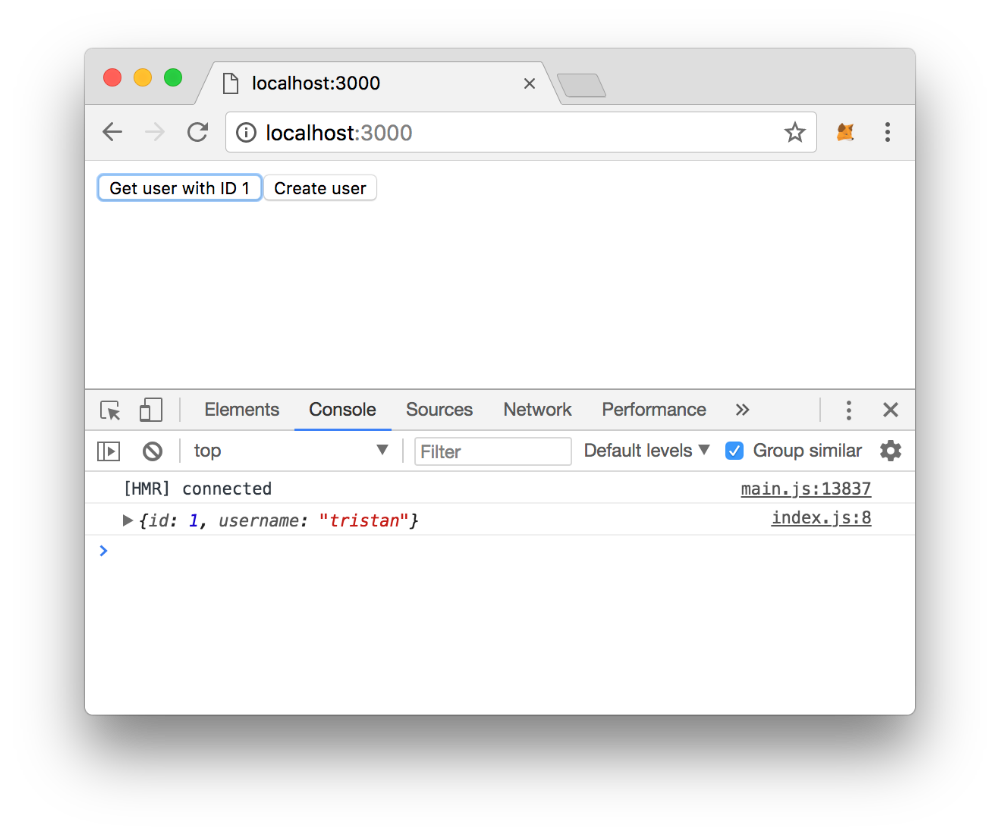 Tada! Magic!
Abstracting the tweet functions
While we're on a roll, let's also make some abstractions for the functions in TweetStorage and TweetController. That way, we can pretty much do anything from our simple button interface.
First of all, create a tweets.js file, right next to the users.js file in your web3 folder. This time, we'll create the getTweetInfo and createTweet functions in one go, since we know how this stuff works already.
// client/web3/tweets.js

import { eth, getInstance } from './provider'

import TweetStorage from "./artifacts/TweetStorage.json"
import TweetController from "./artifacts/TweetController.json"

export const createTweet = async (text) => {
  const controller = await getInstance(TweetController)

  try {
    await ethereum.enable()
    const addresses = await eth.getAccounts()

    // "createTweet" wants both the user ID and the text as params for now:
    const result = await controller.createTweet(
      1,
      text,
    {
      from: addresses[0],
    })

    return result
  } catch (err) {
    console.error("Err:", err)
  }
}

export const getTweetInfo = async (tweetId) => {
  const storage = await getInstance(TweetStorage)
  const tweet = await storage.tweets.call(tweetId)

  const { id, text, userId, postedAt } = tweet

  // Parse the data to make it look nice:
  return {
    id: parseInt(id),
    userId: parseInt(userId),
    text,
    postedAt: parseInt(postedAt),
  }
}
And, as usual, we import these functions in the page index and create some buttons for them to make them easy to test in the browser:
// client/pages/index.js

import { getUserInfo, createUser } from "../web3/users"
import { getTweetInfo, createTweet } from "../web3/tweets" // <-- Add this line

export default class IndexPage extends React.Component {

  // ...

  logTweet = async () => {
    const tweetInfo = await getTweetInfo(1)
    console.log(tweetInfo)
  }

  createTweet = async () => {
    const tx = await createTweet("Hello world!")
    console.log(tx)
  }

  render() {
    return (
      <div>

        {/* ... */}

        <button onClick={this.logTweet}>
          Get tweet with ID 1
        </button>

        <button onClick={this.createTweet}>
          Create tweet
        </button>
      </div>
    )
  }
}
When it's done, click the "Create tweet" button, confirm the transaction, then click on the "Get tweet" button...
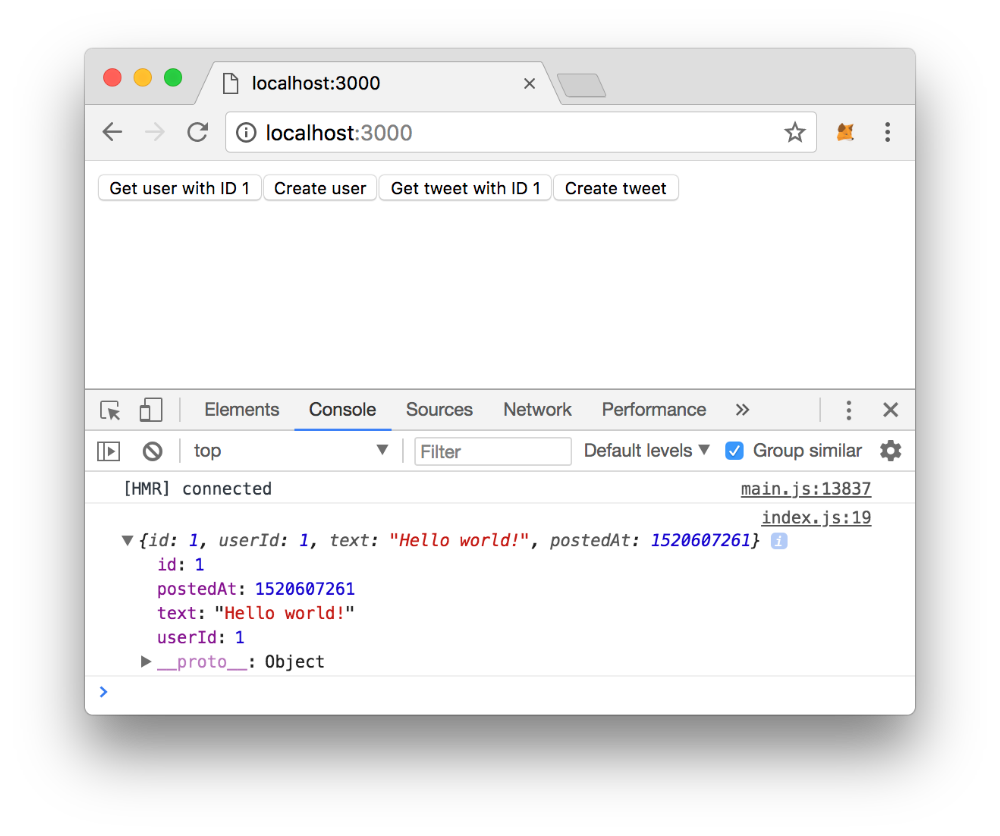 ...and it works! There's the tweet we created!
Well done, we're one step closer to having a real DApp!
In the next chapter, we will go beyond having simple buttons and look closer at how to build the web app's interface using React.