We've now spent quite a bit of time switching between our text editor and the terminal to write our smart contracts. How about we move on to something a bit more fun? Like building the frontend!
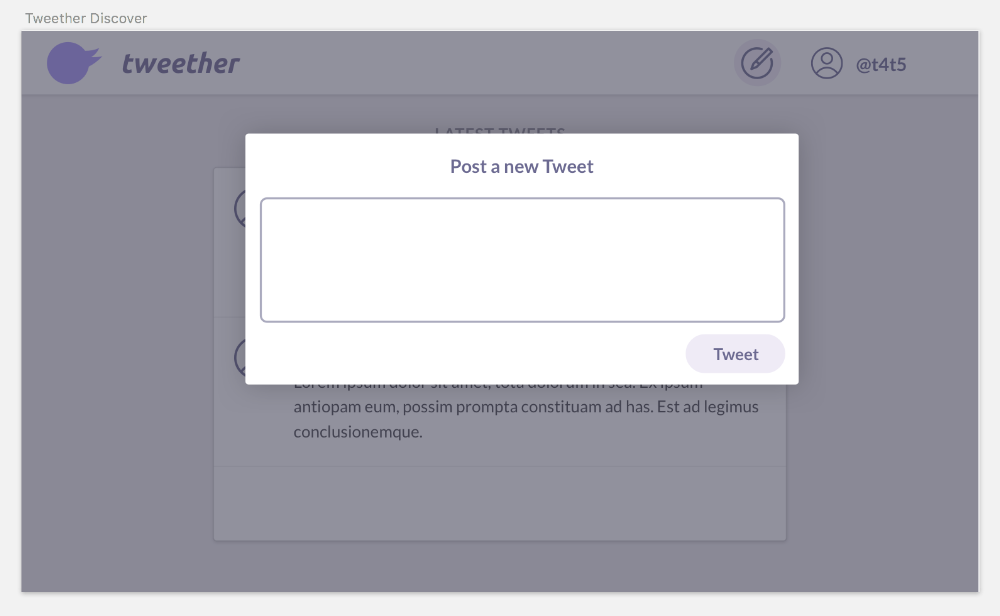 A reminder of what we want our interface to look like.
When it comes to building a web app, there are many options. You can use server-side frameworks like Django and Ruby on Rails, frontend-heavy frameworks like Ember and React, or you could just use plain HTML and JavaScript. The only requirement is that you need a library like web3.js which can connect your web app to the Ethereum blockchain.
Installing Next.js
In our app, we want to use React as our UI library. In order to make things easy and not spend a lot of time setting up our environment and build tools, we'll use the excellent Next.js framework. If you're not familiar with Next, don't worry -- most of it is just plain React, and they also have a fantastic tutorial that you can skim through if you want to familarise yourself with its key concepts.

For now, all we want to do is install Next in order to run a local server and display a simple "Hello world" message in our browser.
We start by turning Tweether into an NPM project by running the following command in the Tweether directory:
npm initOnce you've pressed enter a couple of times, you can then continue by installing next, react and react-dom in the directory.
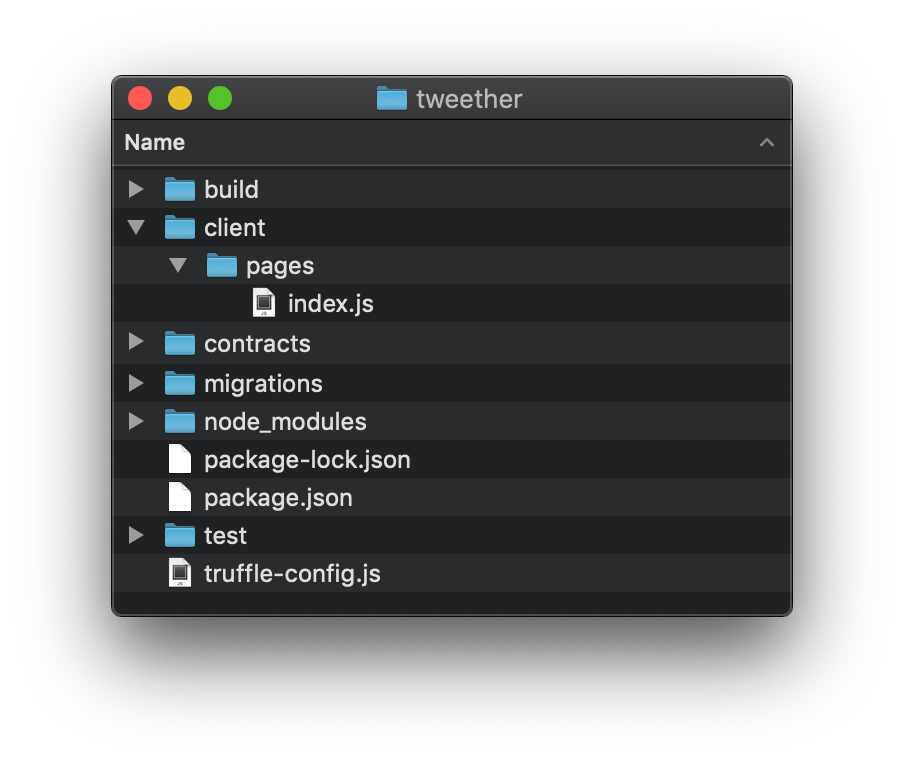
npm install --save next react react-domAfter that, we're going to create a folder called client in the root folder (for everything web-related). In it, we'll create another folder called pages where we'll add an index.js file. That file should just render a very basic React component:
// client/pages/index.js

import React from 'react'

export default class IndexPage extends React.Component {
  render() {
    return (
      <h1>hello world!</h1>
    )
  }
}
Here's what your folder structure should look like at this point:
Finally we want to be able to launch the server simply by running npm run dev. For that, open package.json and set "dev" as an alias for next client in the "scripts" section of the file:
// package.json

{
  // ...
  "scripts": {
    "dev": "next client", // <-- Add this line!
    "test": "echo \"Error: no test specified\" && exit 1"
  },
  // ...
}
Now open a new terminal window, run npm run dev, and go to localhost:3000 in your browser.
 So far so good!
Installing MetaMask
Next, we want the user to be able to communicate with the Ethereum blockchain from their browser. In order for that to work, they need to have a wallet that can send requests through web3.js. Fortunately, the Ethereum community has adopted a wallet that has become the de-facto standard for integrating with web services -- MetaMask.

MetaMask is a Chrome (and Firefox) extension that automatically creates an Ethereum wallet for you and injects the web3 library into whatever website you're on. That way, the user doesn't have to run a full node and the developer can just assume that the user is using MetaMask whenever they need to do blockchain stuff. Nifty!
Let's see how MetaMask works! If you haven't done so already, install the MetaMask Chrome extension. After that, click the little orange icon in the top right of your browser window, and you'll be asked to set a new password for your wallet.
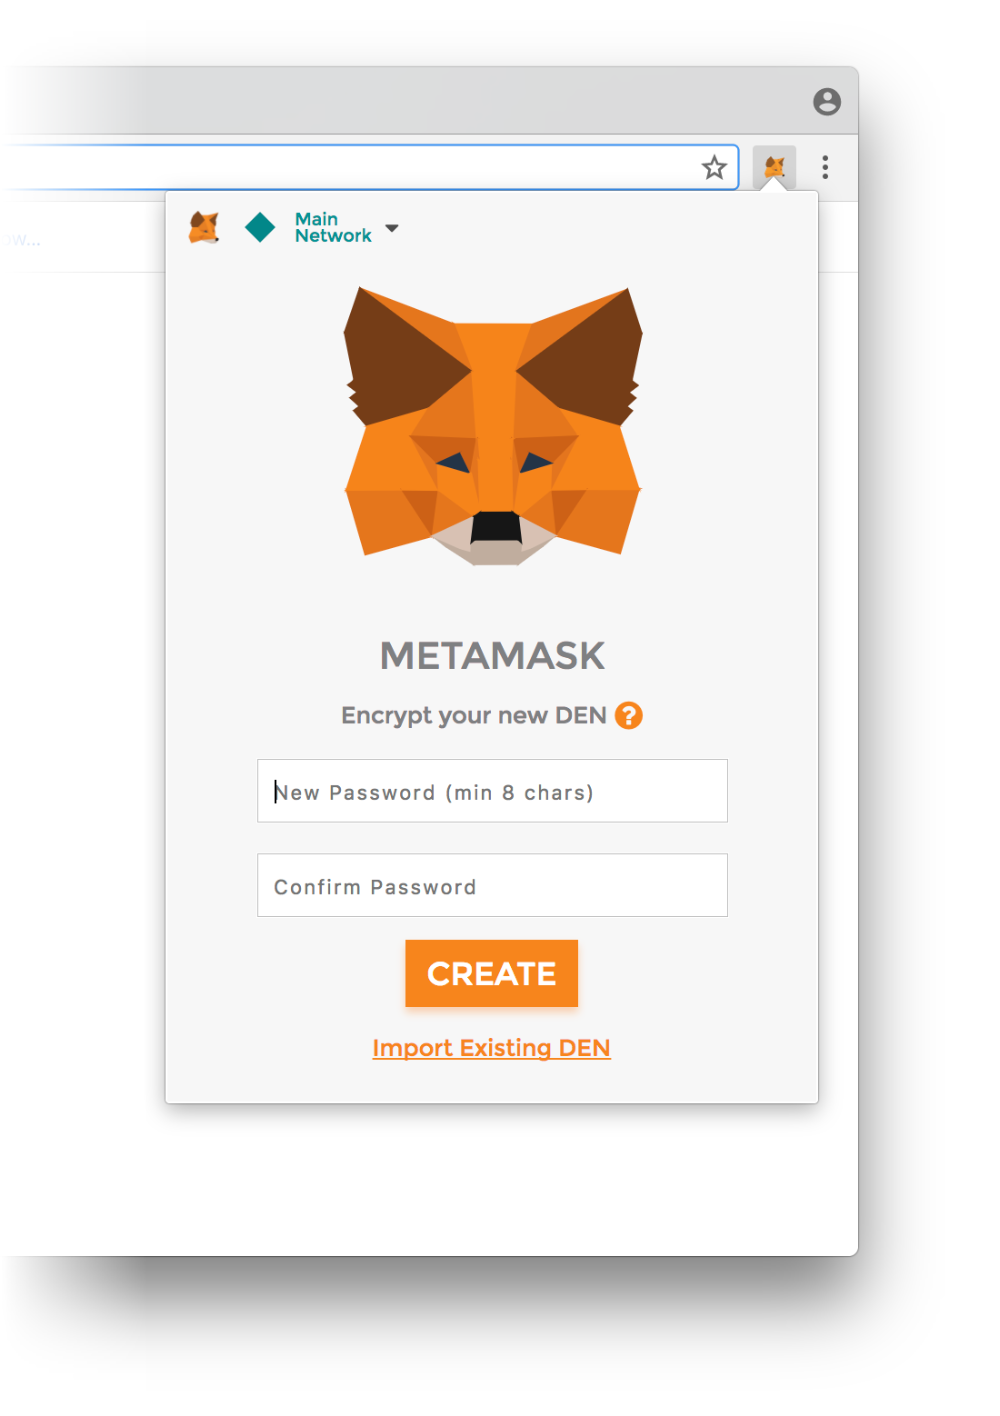
Make sure you pick a good password, because you'll want to use this wallet in the future for real applications too!
Make sure you write down the 12 randomly generated words somewhere so that you can always restore your wallet if it's lost. After that, you're good to go!
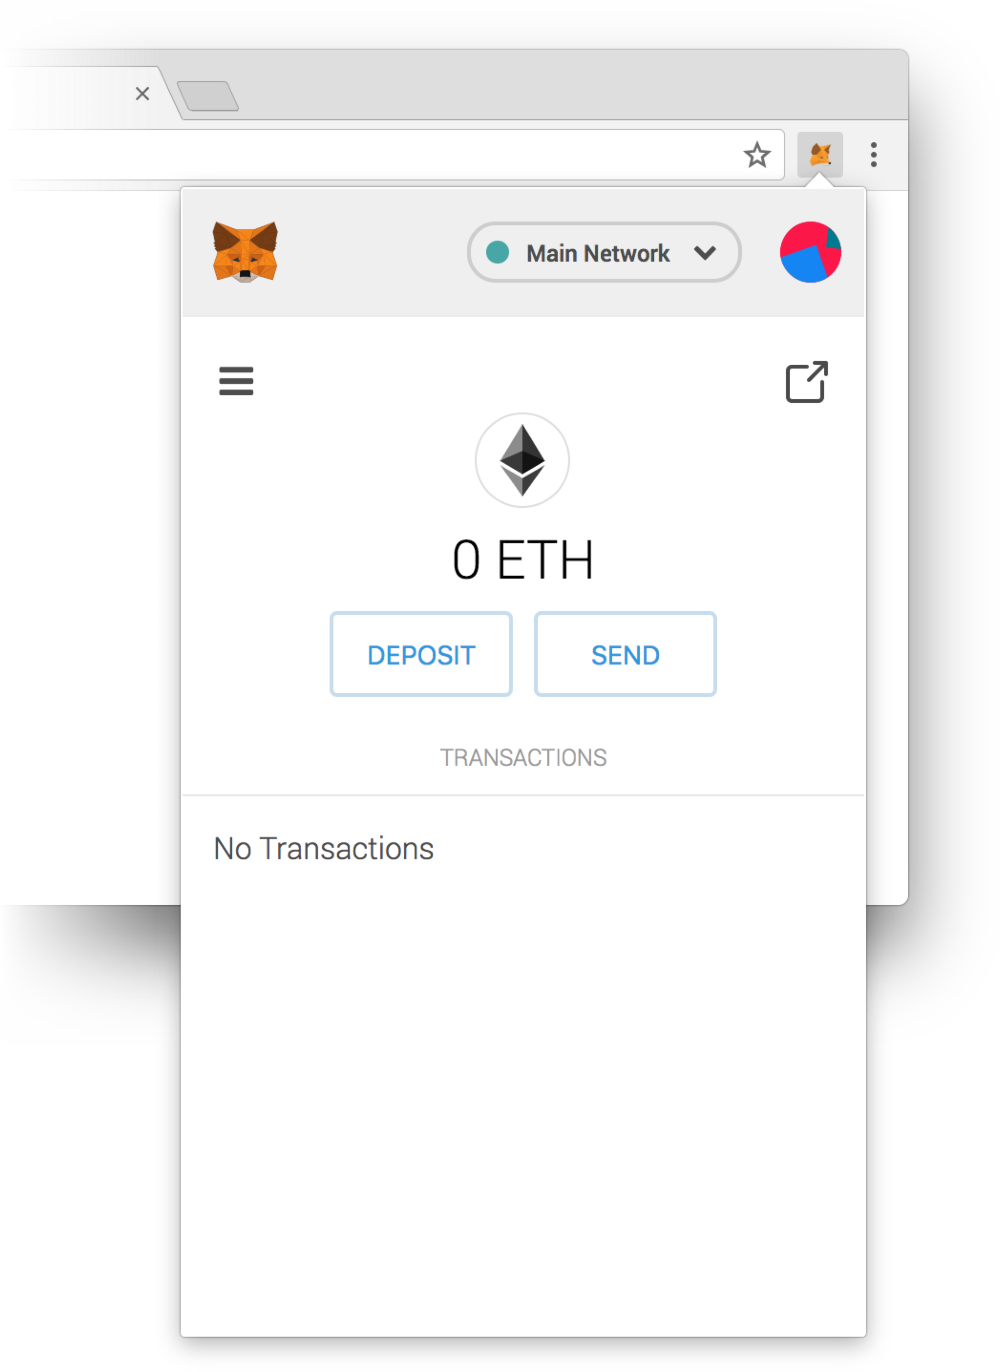
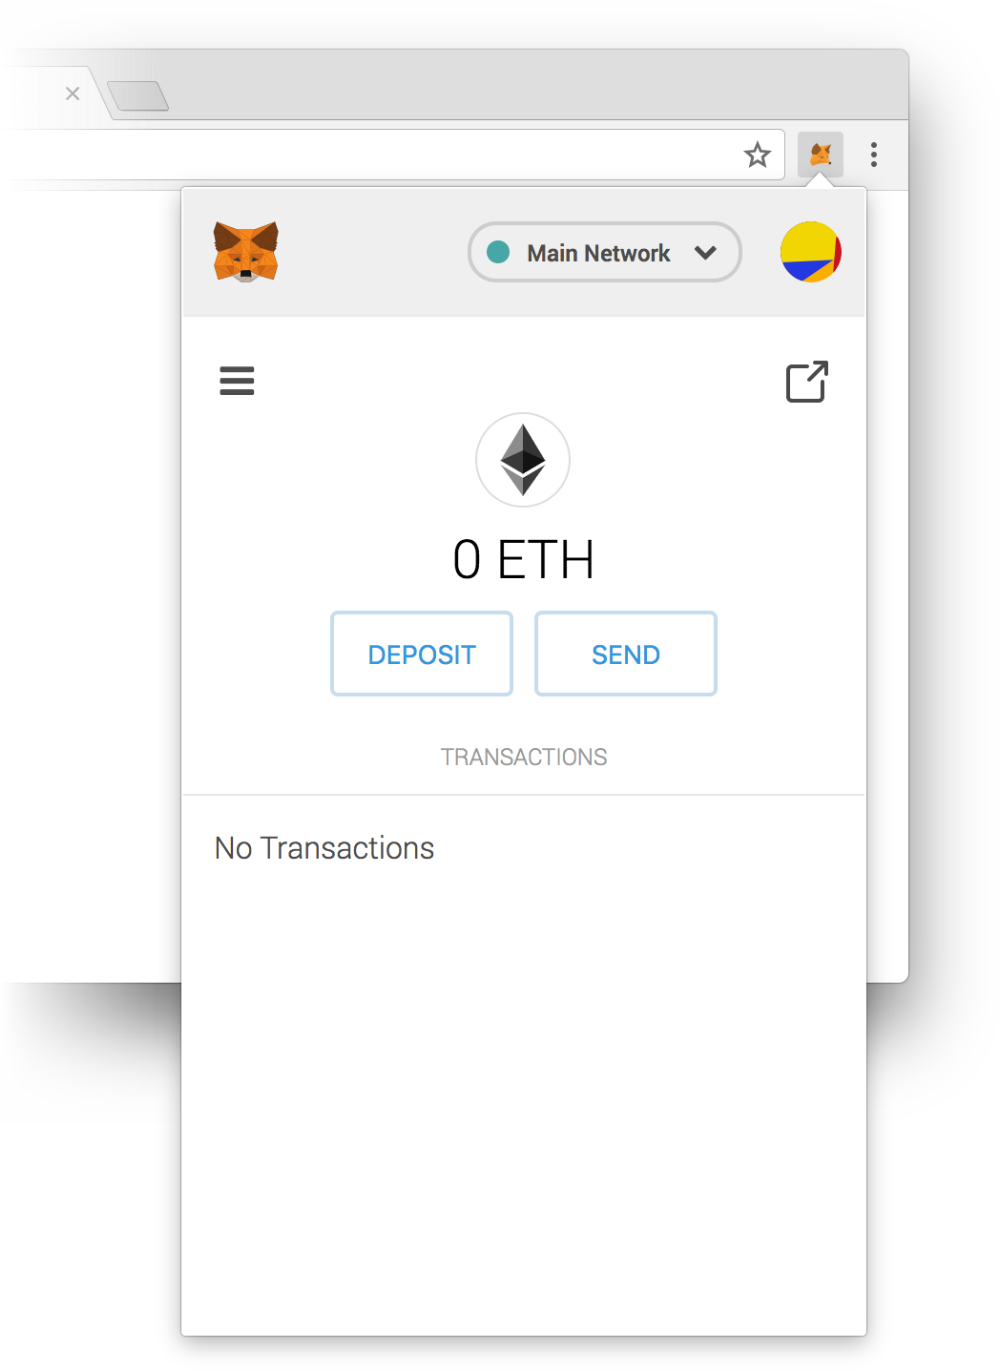
Once everything is set up, you should see your empty wallet account.
By default, MetaMask will connect to the Main Network, which is Ethereum's "real" network, where production applications are deployed.
There are also 3 test networks (Ropsten, Kovan and Rinkeby), which use a shared blockchain that everyone can connect to, but where the network is deliberately slow and ether is practically free.
Finally, we also have our local network (localhost:8545), which we initiated when we ran the ganache-cli command, and only exists on our computer. This is the one that we want to connect to for now!
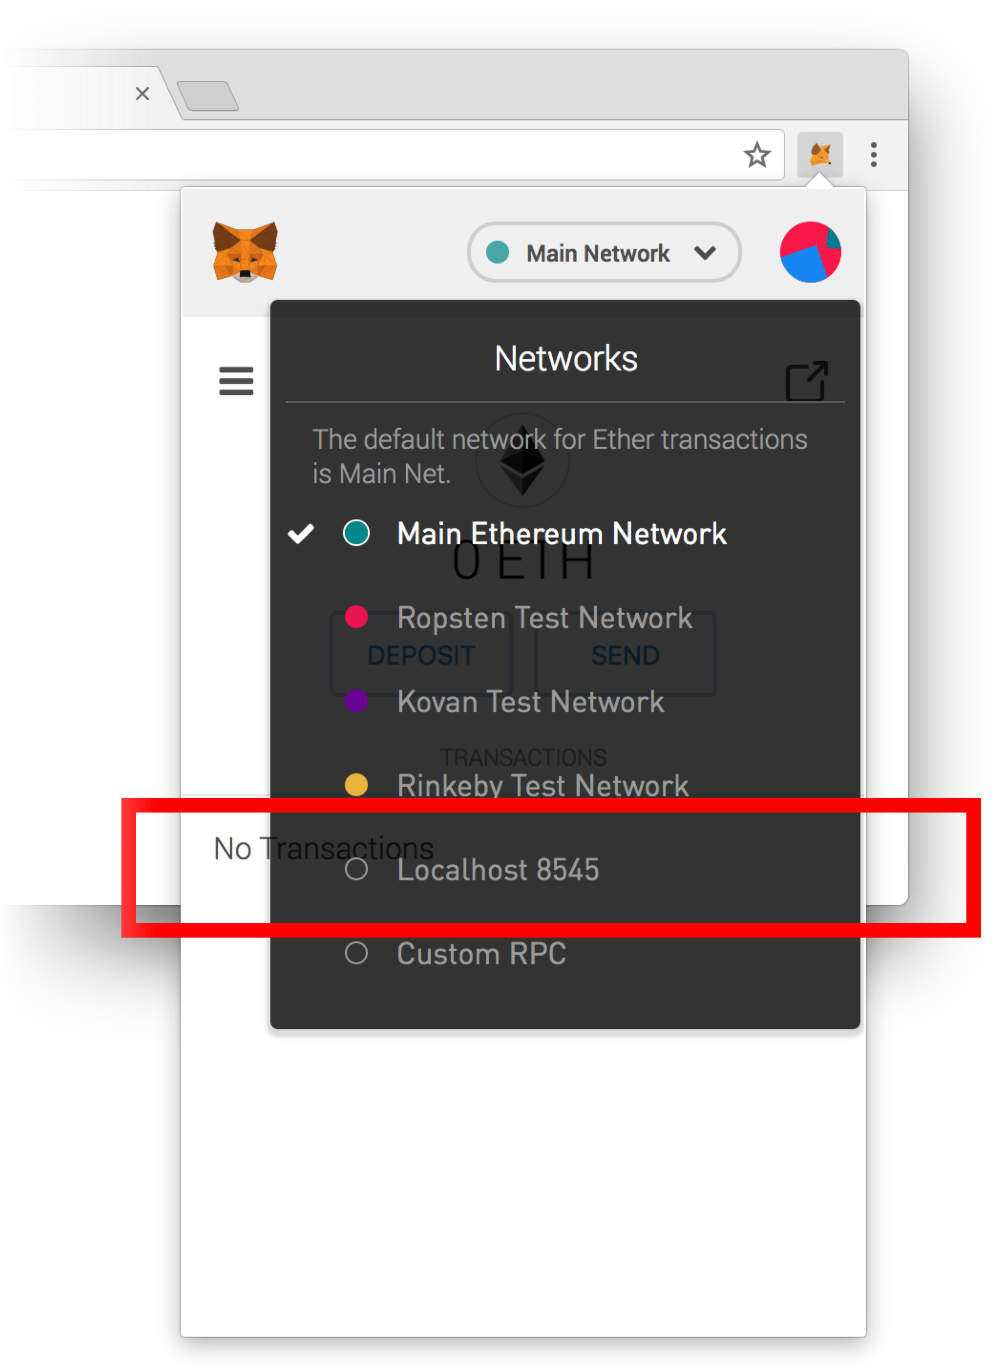
To test our app, we need to connect to the local Ethereum network.
Interacting with MetaMask
Now we want to connect to the Ethereum network from our web app, using MetaMask as the provider.
The first thing we need to do is to install web3 as a dependency for our NPM project, so that we can import it when necessary:
npm install web3 --saveTo see how it's used, let's create a file called provider.js in a new web3 folder and paste this code into it:
// client/web3/provider.js

import Web3 from "web3"

const provider = () => {
  // If the user has MetaMask:
  if (typeof web3 !== 'undefined') {
    return web3.currentProvider
  } else {
    console.error("You need to install MetaMask for this app to work!")
  }
}

export const eth = new Web3(provider()).eth
This snippet of code (or a variation of it) is always used in DApps. It basically checks if MetaMask has injected the web3 library into the browser, and if so, uses it to connect to the Ethereum network.
Thanks to this piece of code, we can now head back to our index.js file, import the eth object, and use it to list all the addresses that the user has available on their MetaMask account.
Since the web3 library is only injected on the client-side, even though the Next.js framework supports server-side rendering, we will only call web3-specific functions in client-side only hooks like componentDidMount:
// client/pages/index.js

import React from 'react'
import { eth } from '../web3/provider'

export default class IndexPage extends React.Component {

  async componentDidMount() {
    try {
      await ethereum.enable() // Prompt user to let our DApp access their addresses
      const addresses = await eth.getAccounts() // Get user's ETH addresses
      console.log(addresses)
    } catch (err) {
      console.error("User denied access to their ETH addresses!")
    }
  }

  render() {
    return (
      <h1>hello world!</h1>
    )
  }
}
Now reload your browser page. If you're logged in to your MetaMask account, you should see something like this:
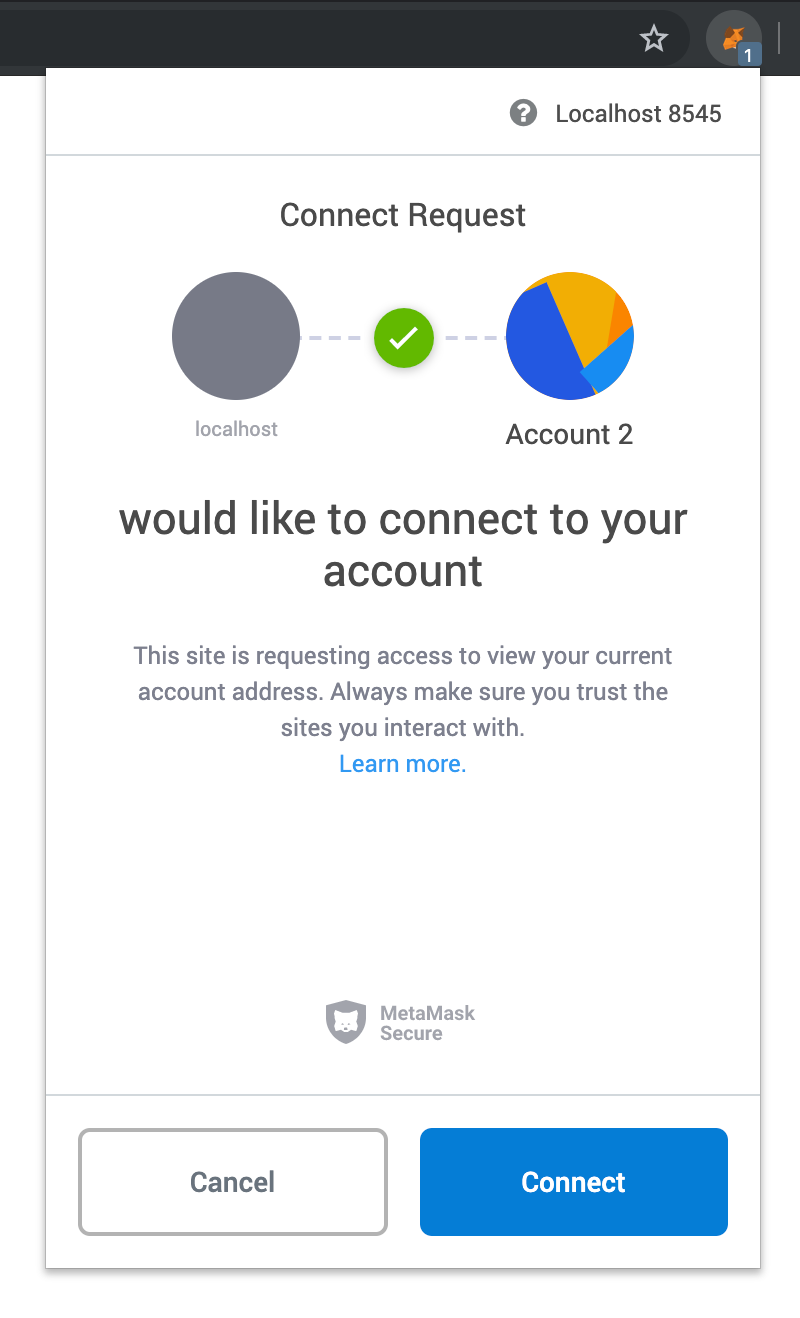
After you click the "Connect" button, you should then see the following in your console:
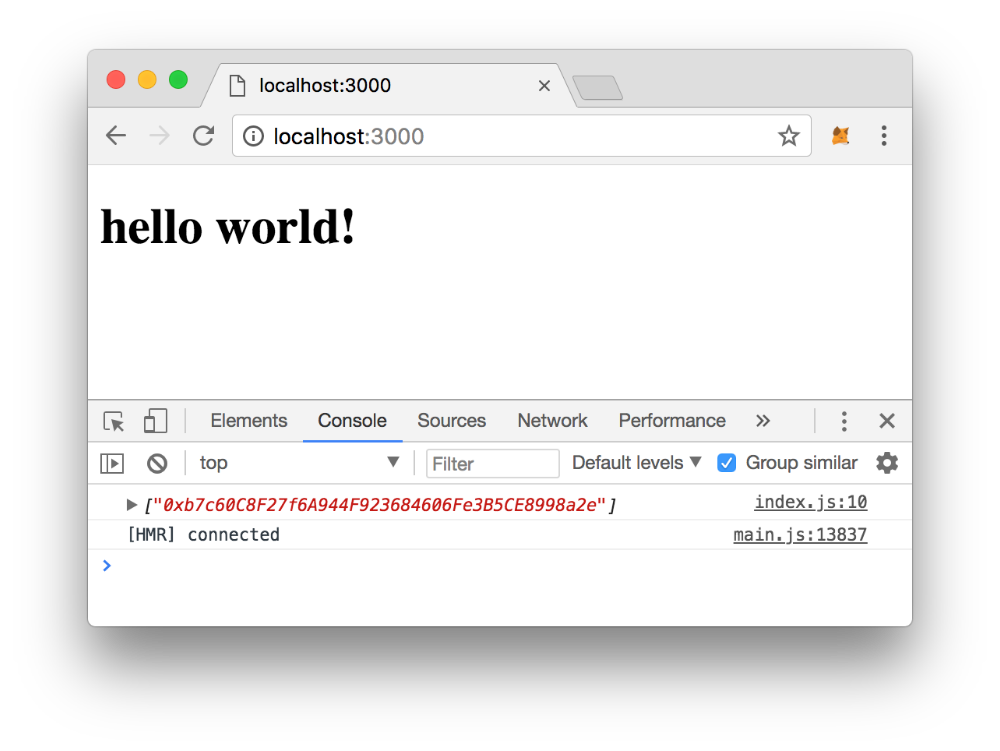 An array containing our address!
Pretty cool, huh? Let's try something else -- we now want to get the balance of this address.
// client/pages/index.js
import React from 'react'
import { eth } from '../web3/provider'
export default class IndexPage extends React.Component {
async componentDidMount() {
try {
// ...
// Add these 2 rows:
const balance = await eth.getBalance(addresses[0])
console.log(balance)
} catch (err) {
console.error("User denied access to their ETH addresses!")
}
}
// ...
}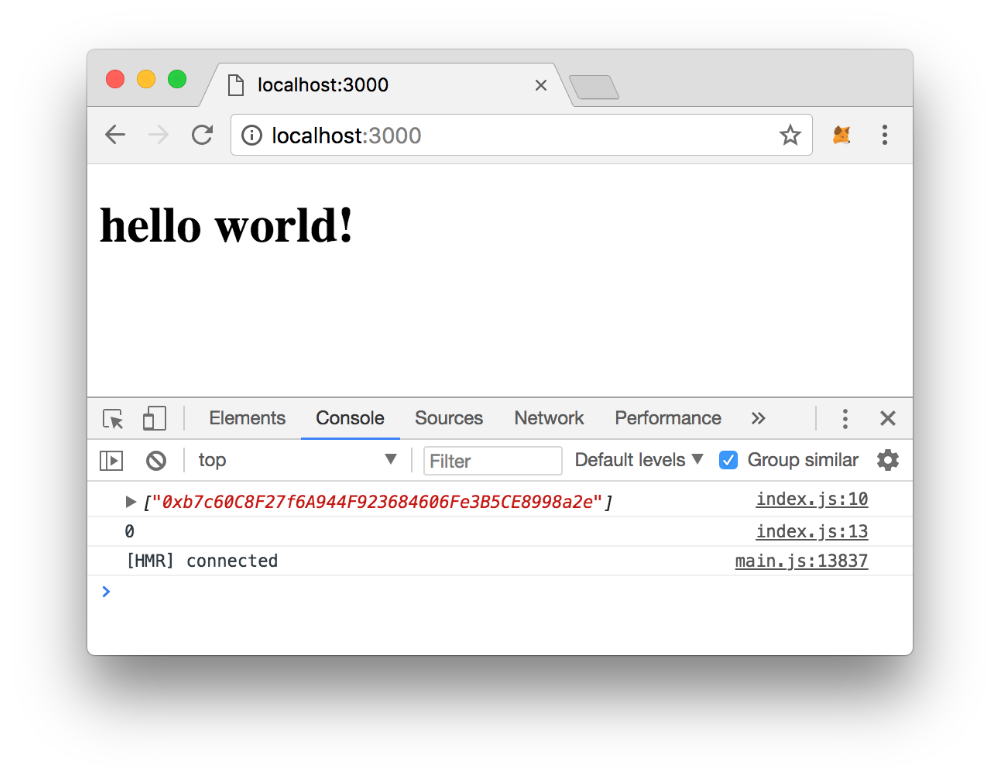 Head back to the browser, refresh, and you'll see a big pretty zero reminding you of how poor you are!
Funding your MetaMask wallet
Having an empty balance in your MetaMask is a problem since every writeable function that you call in your contract costs a small amount of ether. However, since we're on the test network, it's actually quite easy to top up your balance!
Open a new terminal window and type truffle console -- this will open up the interactive truffle environment, where you have access to your default ganache-cli addresses (each containing 100 "test" ethers)!
To see the addresses in your wallet, you can use the getAccounts function:
> web3.eth.getAccounts()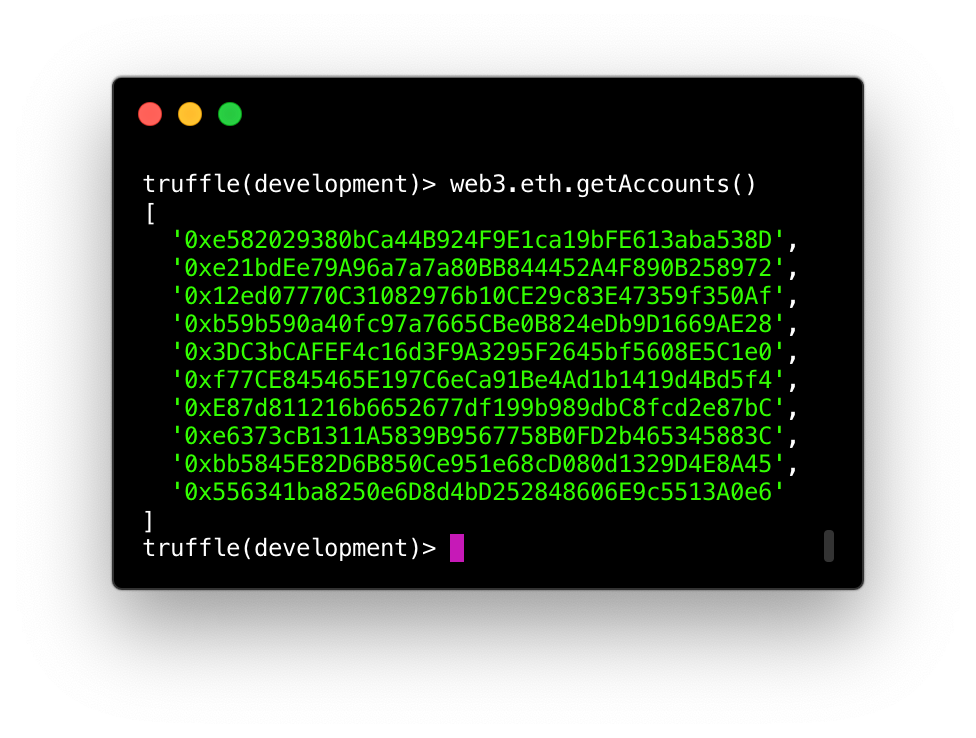 Normally, you will see 10 different addresses in your wallet.
To check the balance of your second address (which would have index 1) for example, you can run the following code in your Truffle console:
> const addresses = await web3.eth.getAccounts()
> const sender = addresses[1]
> const balance = await web3.eth.getBalance(sender)
> web3.utils.fromWei(balance, "ether")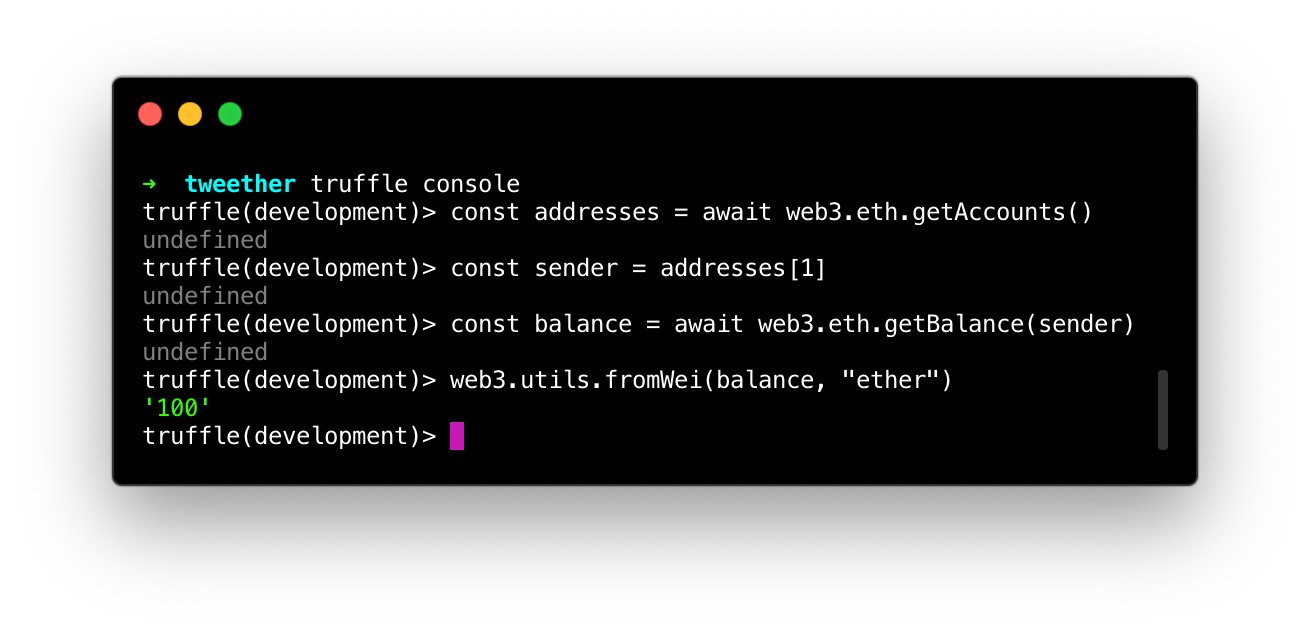 Since the balance is shown in wei by default, we use the "fromWei" utility function to display it in ether instead.
So this is the balance of our second address. The balance of your first address should normally be slightly under 100. All test addresses in Ganache CLI start out with 100 ether, but since we've used our first address to deploy some contracts to our local network already, the balance has dropped a bit.
💡 You can also generate 10 brand new addresses that all have 100 ether simply by stopping your Ganache server and running
ganache-cliagain.
Now that we've established that there is indeed fake money in our test addresses, it's time to send some of that money over to our MetaMask wallet instead!
Start by clicking on your browser's MetaMask icon and copy your account address.
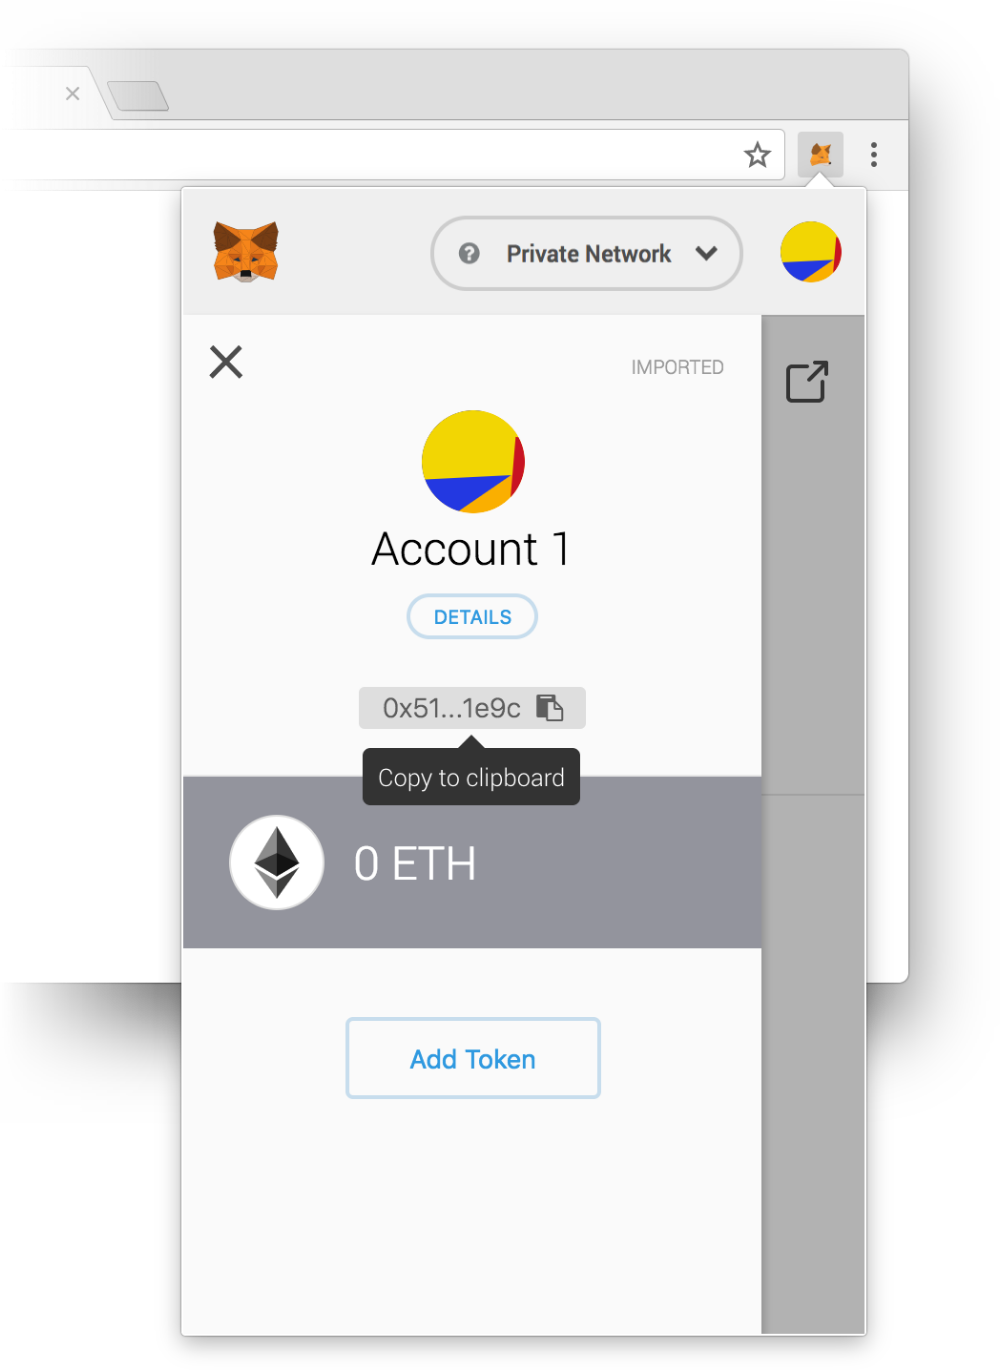 Click on the hamburger menu on the left side, then click on your account's Ethereum address.
Head back to the Truffle console and save the copied address as a variable called receiver. We'll then craft a transaction that sends 90 ether from sender to receiver:
> const receiver = "0x51Be0461D465CA650483D2A01F58eEefE1eE1e9C" # Replace this with your own MetaMask address
> const amount = web3.utils.toWei("90", "ether")
> web3.eth.sendTransaction({ from: sender, to: receiver, value: amount })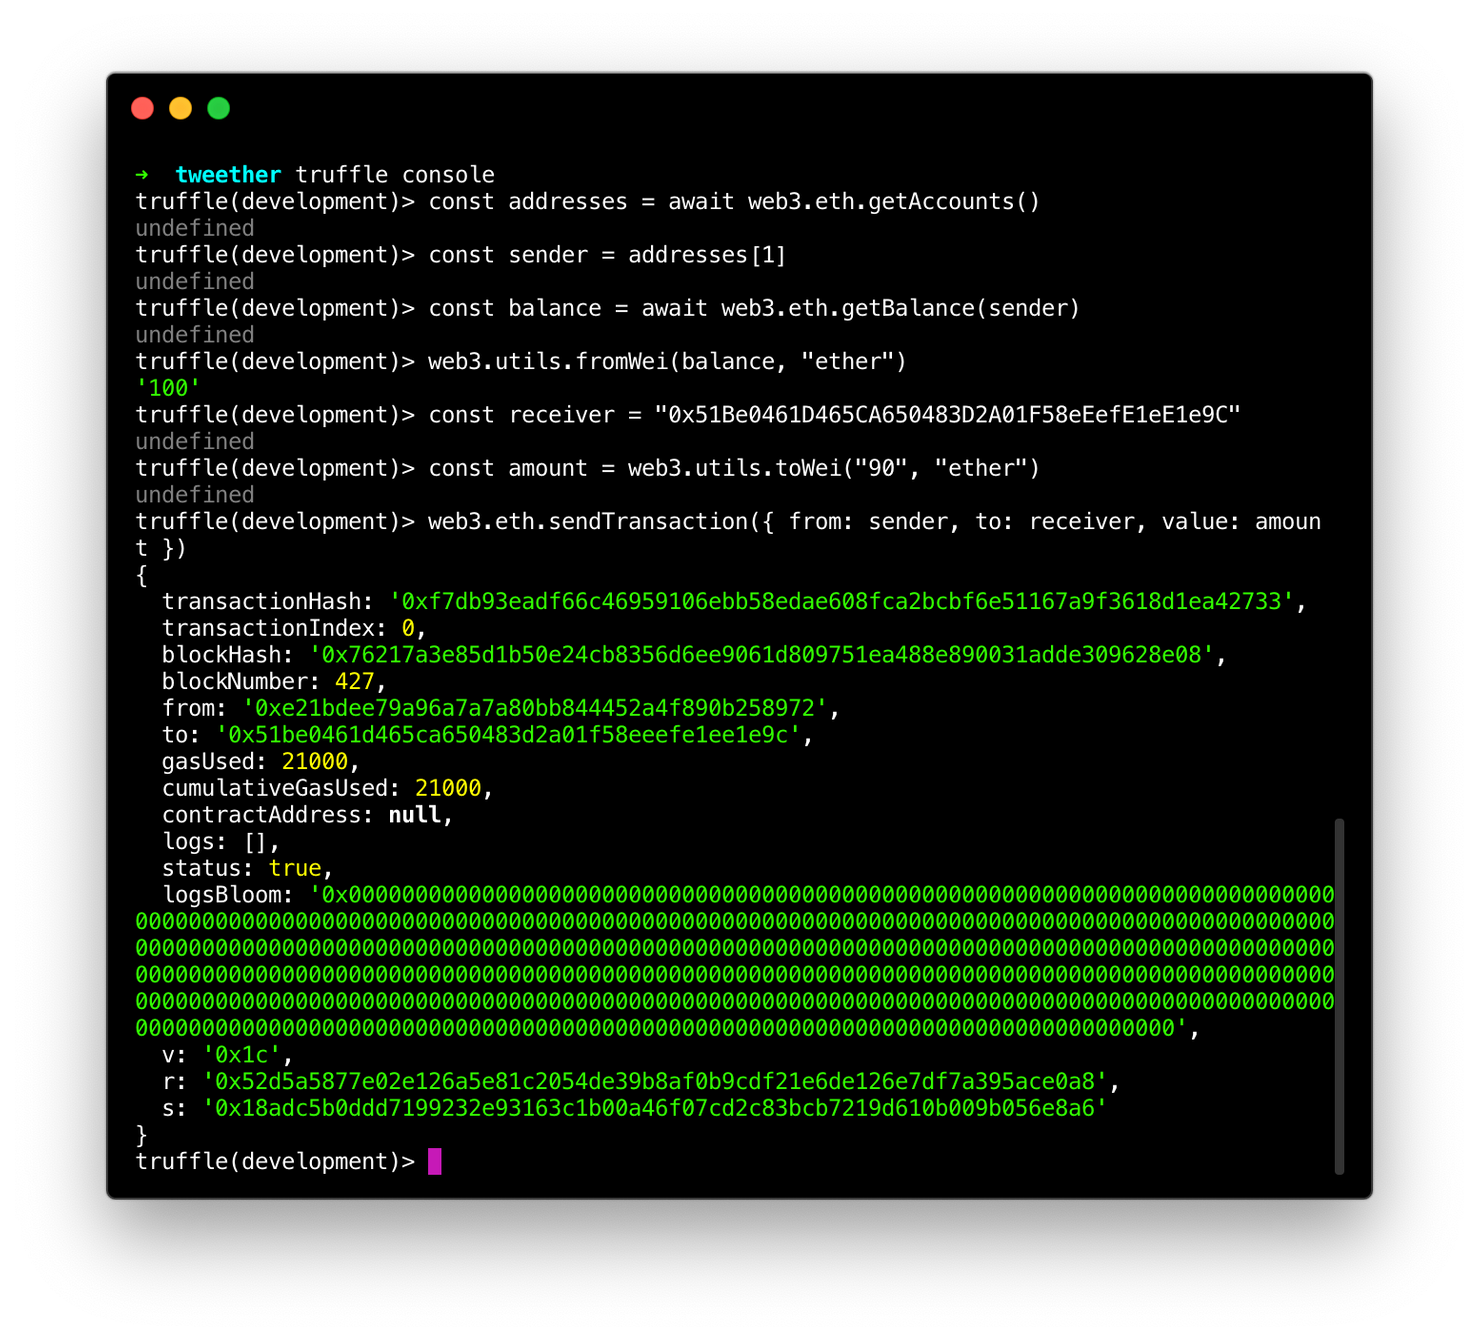 If you followed the instructions correctly, you should see a green transaction ID after sending your transaction.
Now go back to your browsers MetaMask section, and you should see a fresh balance of 90 ethers appear!
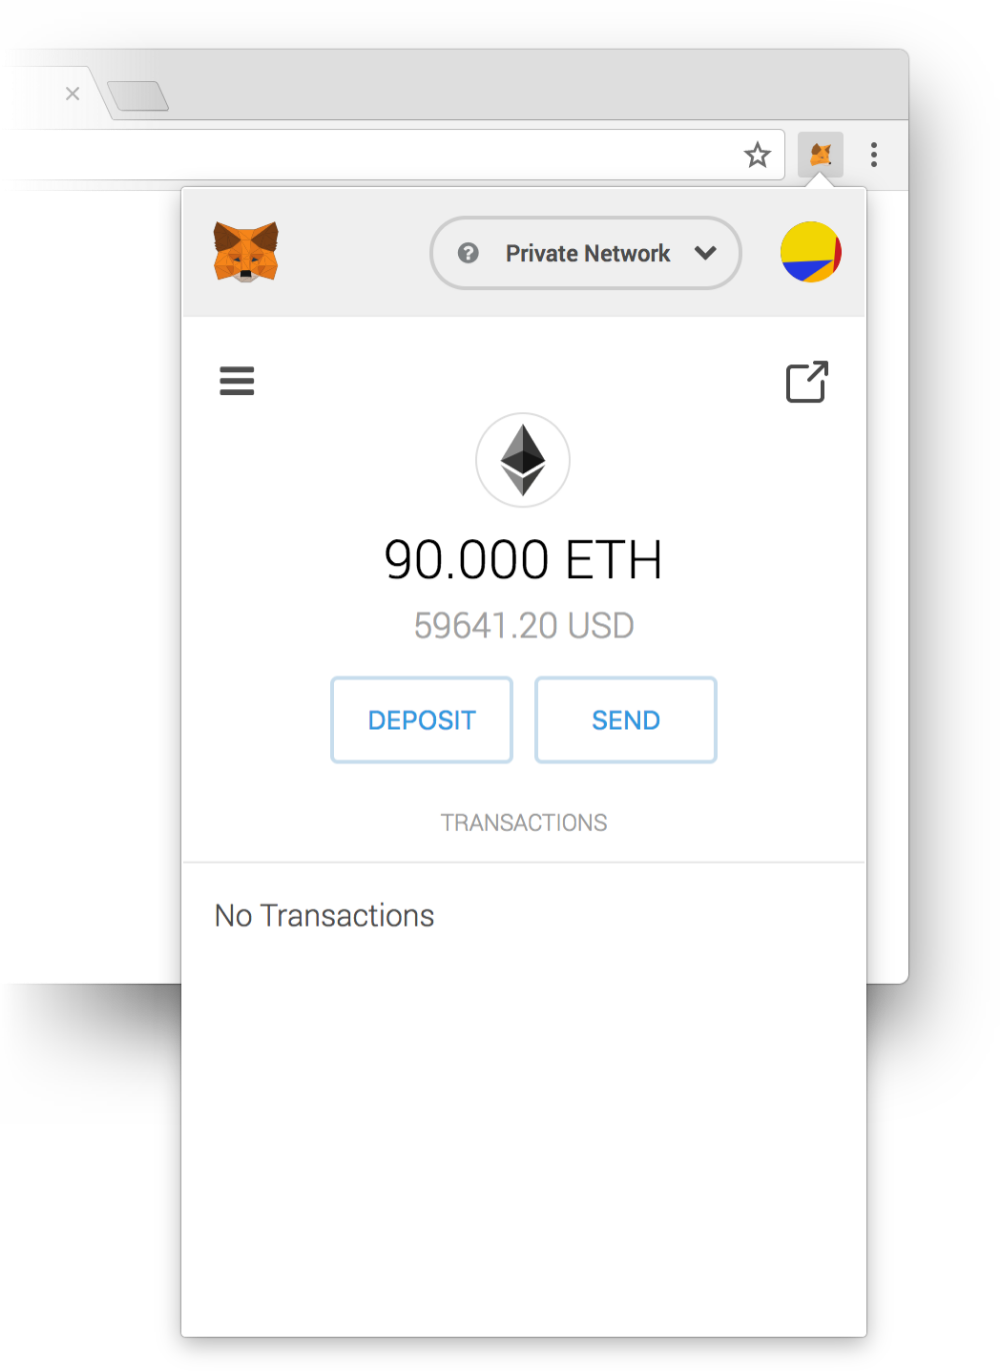 Sweet!
Before you get all ecstatic about your new wealth, remember that this is just fake ether on the test network. If you switch MetaMask back to the "Main network", your account's balance will still be zero. Sorry, you don't really have thousands of dollars...
 :(
:(
You should now have some basic understanding of how to use MetaMask when developing your DApp. In the next chapter, we'll deploy our contracts to the test network and use MetaMask to communicate with them!