The moment you've been waiting for -- deploying our contracts to the real Ethereum network, a.k.a the "mainnet"!
Before we begin, it's worth mentioning that this part actually requires that you spend some real ethers, and if you have a lot of code, it could get expensive! Therefore, we'll actually only deploy the token contracts in this chapter, but you can obviously use the same pattern to deploy all contracts in your DApp.
The steps that we need to take to deploy to the mainnet are very similar to the ones for the testnet. In essence, you will need to:
-
Download the blockchain data for the mainnet
-
Run an RPC server on localhost that's accessible by a port (for example: 8547)
-
Create an **account **(private key) in your Geth client
-
Transfer funds to that account so that it can pay for the transaction costs of uploading the contracts
Syncing the blocks
Using Geth, we will start syncing the blocks for the mainnet. This time, we'll add some more options to our geth command right away though:
geth --syncmode "fast"The only difference compared to the commands we ran in the previous chapter is that we've omitted the --testnet option. Again, this is going to take a while to sync, so you just need to have some patience. Go make a coffee or something!
If you want to follow the progress of your download, you can run...
geth attach http://127.0.0.1:8547...and then type eth.syncing inside the console to get the current status:
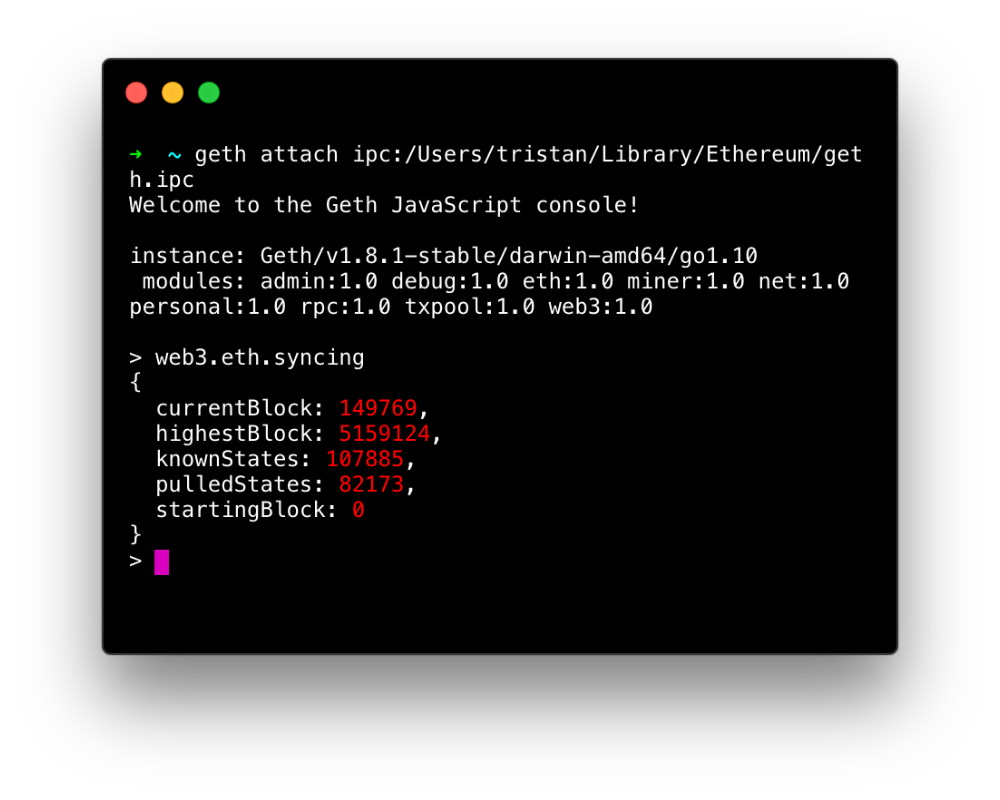 According to this, we've downloaded 149769 blocks out of 5159124. In other words, 149769100/5159124 ≈ 2.9% of all the blocks!*
Creating a wallet
Just like we did for the testnet, we will now create a new Ethereum wallet. Go into the Geth console and run the following command:
> personal.newAccount()This time though, make sure that you pick a secure password and save it somewhere!
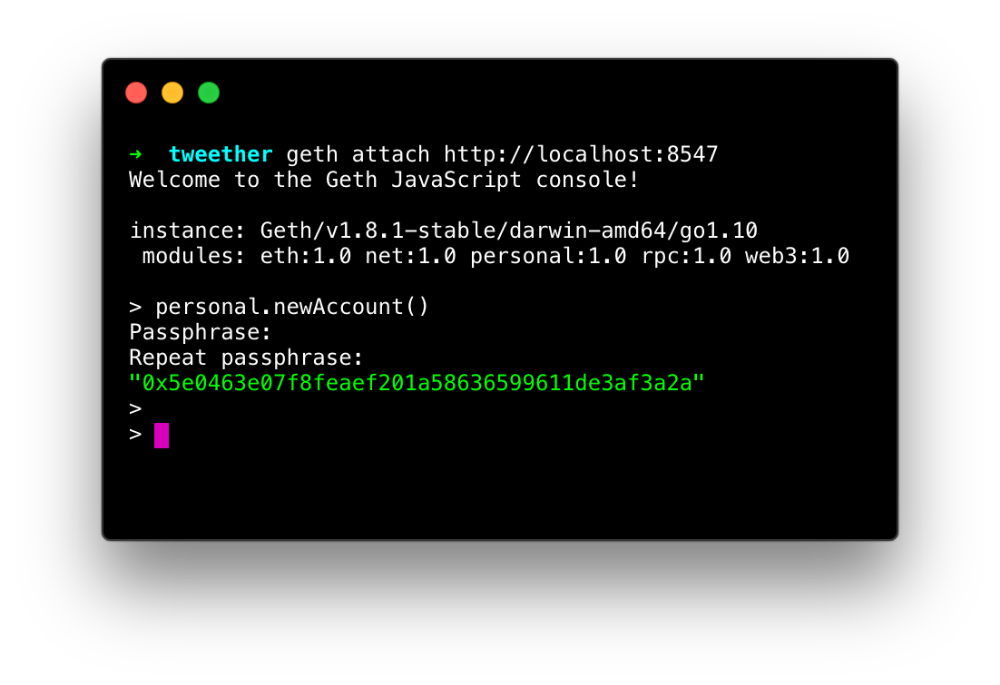 Once your account has been created, you will get your public key.
Send a small amount of ethers to this address that you can use to pay for your future deployments. For this lesson, 0.1 ETH should be enough.
Deploying with Truffle
Just like with our testnet deployment, we need to give Truffle some info about the network that we want to use in our project's truffle.js file.
// truffle.js

module.exports = {
  networks: {

    // ...

    live: {
      host: "127.0.0.1",
      port: 8547,
      network_id: 1,
      from: "{YOUR GETH ADDRESS}",
    },
  },
};
One important thing that we should add to this configuration is the gasPrice. By default, Truffle usually sets a gas price much higher than the average. To find out what the current median price is, you can type eth.gasPrice in the Geth console.
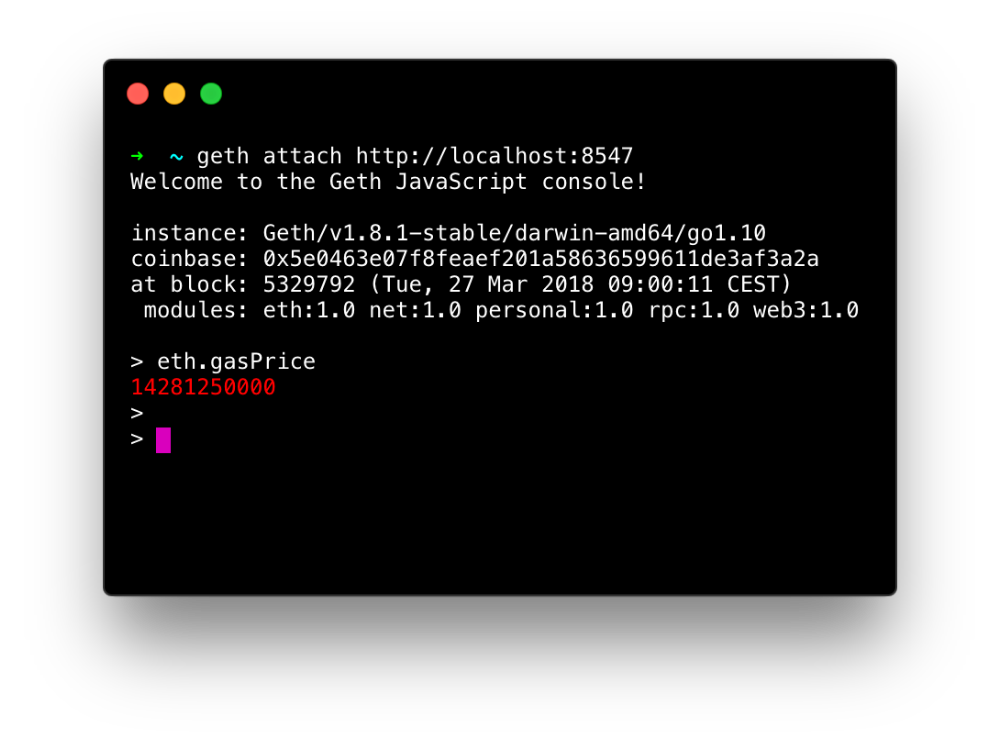 Now we know what gas price to put in our config file.
// truffle.js

module.exports = {
  networks: {

    // ...

    live: {
      // ...
      gasPrice: 14281250000, // <-- Add this line (with your own value)!
    },
  },
};
We're almost there! Staying in the Geth console, we now need to unlock our account. To do this without showing our password in clear text, you can pass null as the second parameter in the personal.unlockAccount function.
> personal.unlockAccount("{YOUR_ADDRESS}", null, 0)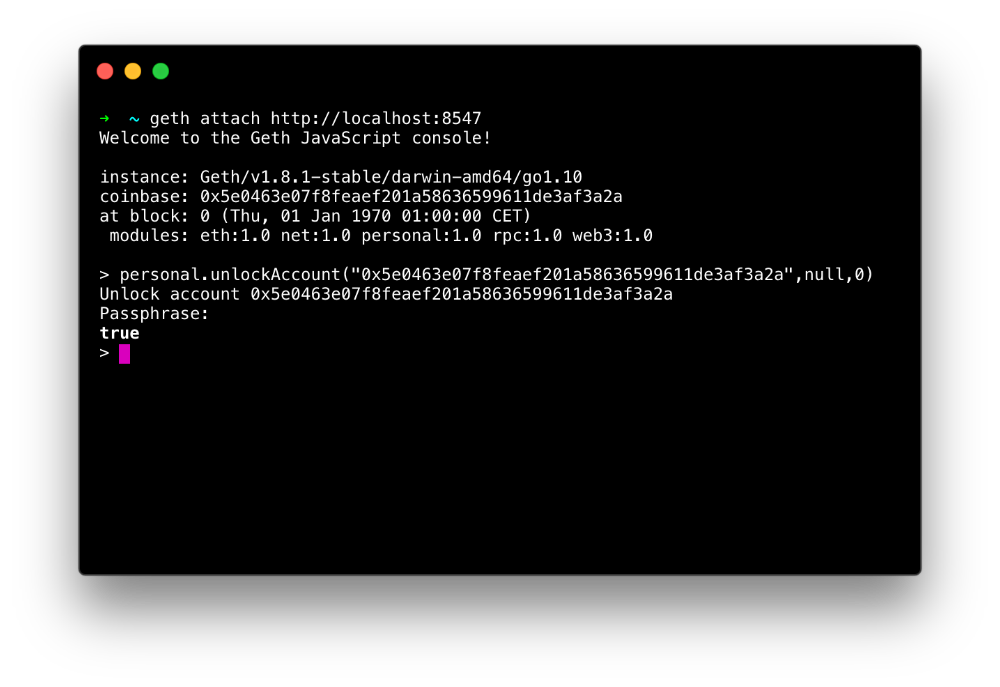
We're now ready for deployment. Go back to your Tweether project and, since we only want to deploy the contracts related to our token, run the following command:
truffle migrate -f 6 --network live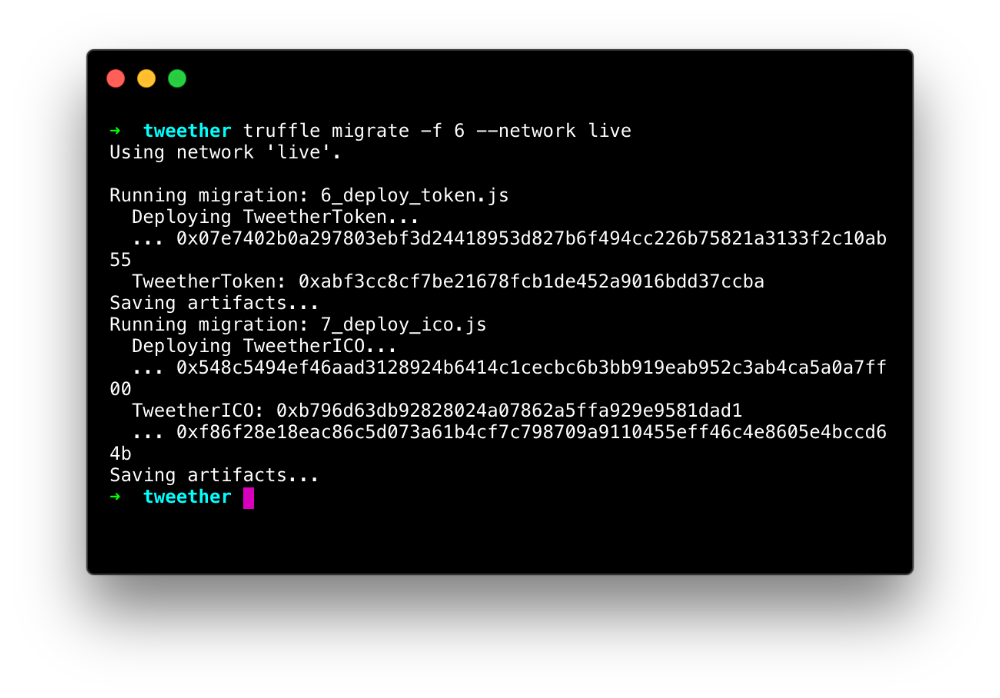
Congratulations, you've now deployed your first smart contracts to the live Ethereum network!
Verifying your contracts
One often overlooked task that you should do after deploying your contracts is to verify them on Etherscan.
What exactly does this mean? Well, if you check out your TweetherToken contract on a block explorer like Etherscan (by going to etherscan.io/address/{YOUR TOKEN'S ADDRESS}, you'll see that it displays the compiled code for it:
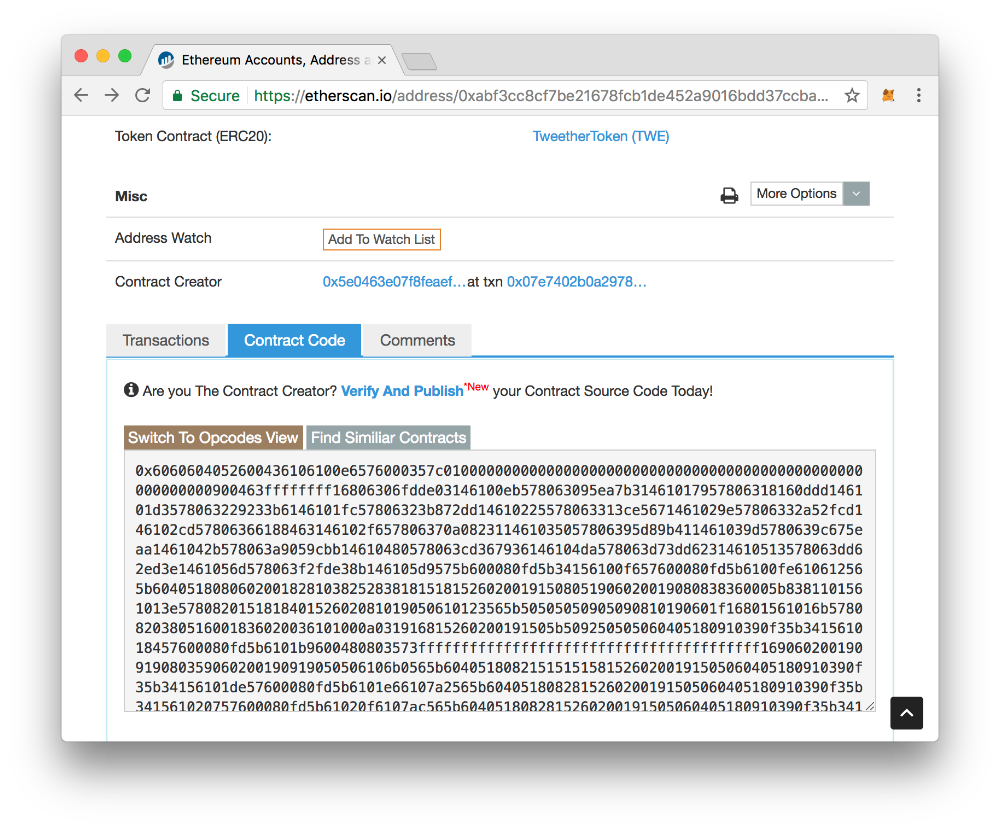
While your smart contract is technically public and trustless, pretty much no one can read and understand this compiled code. For all you know, a smart contract could present itself as doing one thing, while the actual code does something completely different, and most people would have no idea.
To fix this trust issue, what you really want to show is the original code written in Solidity -- a language that Ethereum developers are familiar with. That's why Etherscan has developed a process that lets you upload your original Solidity code, which they will then compile and compare to the code stored on the contract address. If it matches, the Solidity code will be saved on their website for everyone to see. Pretty handy!
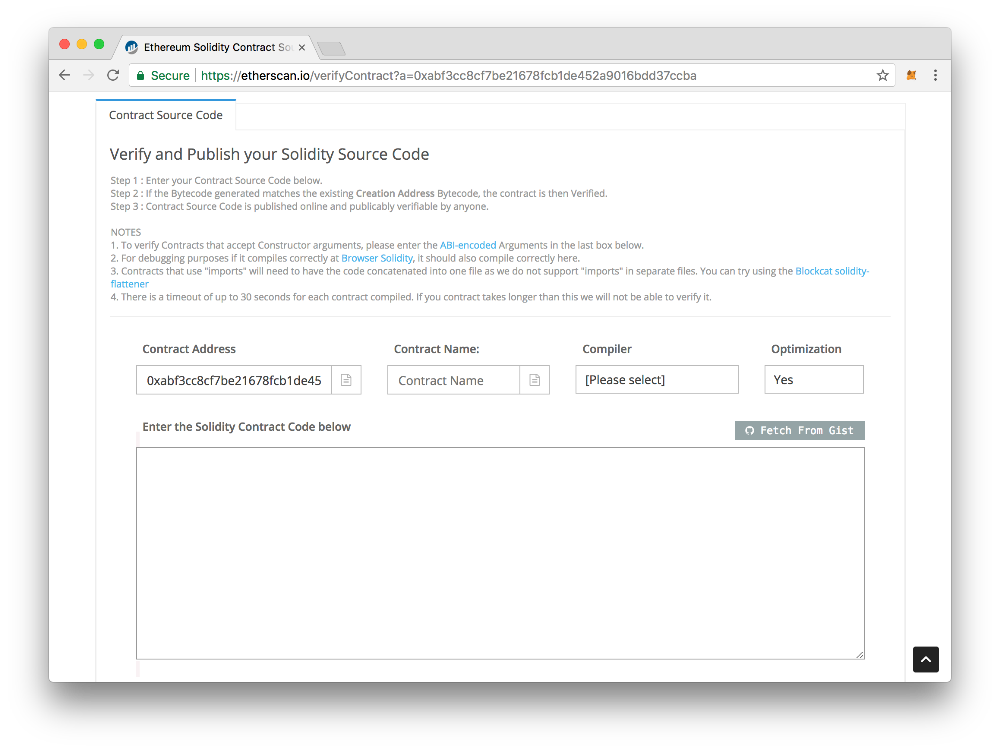
Without further ado, let's verify our TweetherToken contract! To get started, click on "Verify and publish" under the "Contract code" tab:

You will then be redirected to a page where you can paste in your contract file's Solidity code:
While it's temtping to just copy the code from your project's TweetherToken.sol file and paste it in there, this will not be enough. Since your TweetherToken contract inherits properties from other imported contracts like StandardToken.sol (which in turn, inherits from even more contracts), we need to include all of those as well!
Fortunately, instead of manually copying code around, there's a handy tool called truffle-flattener that can generate a single file for us. Let's install it globally through NPM:
npm install truffle-flattener -gNow, in your Truffle project, run the following command to "flatten" your TweetherToken contract:
truffle-flattener ./contracts/token/TweetherToken.sol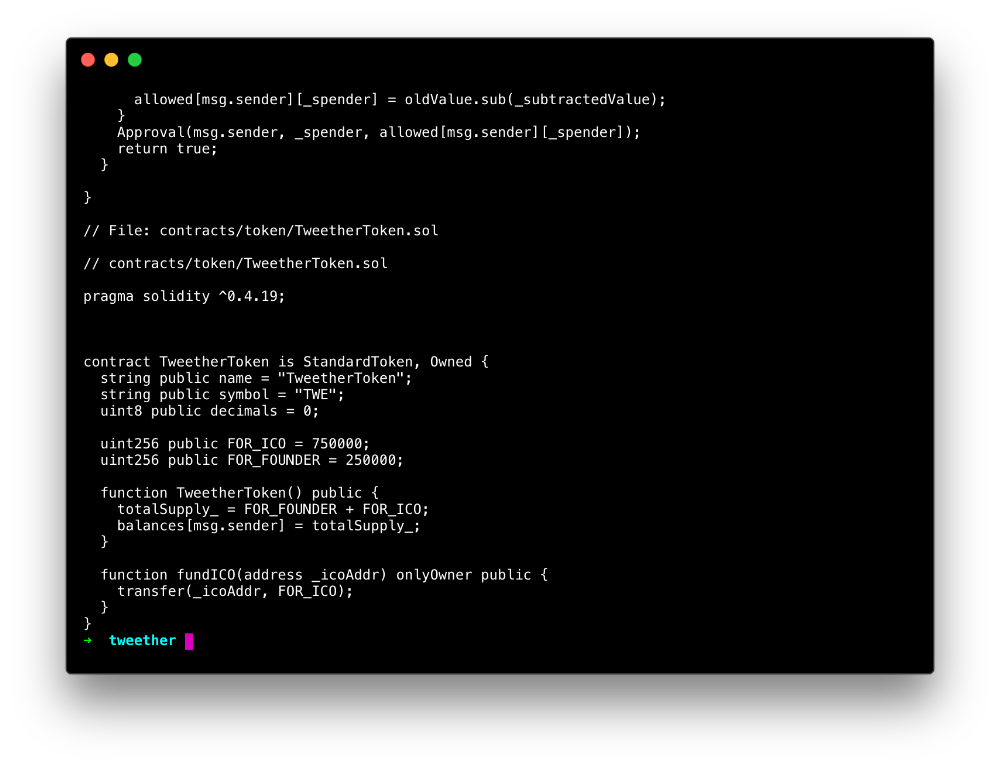 The flattened Solidity code should be printed out in your console.
Then, paste the output code into Etherscan's code box:

Finally, we need to fill in the boxes above:
-
Contract Name: This is the name of the "primary" contract that imports all other contracts. In our case, it's
TweetherToken. -
Compiler: You can find out what Solidity compiler your Truffle version is using by running
truffle versionin your project. In my case, it'sv0.4.19, therefore I should selectv0.4.19+commit.c4cbbb05(don't pick a version marked as "nightly"). -
Optimization: Since we haven't set any flags to optimize our compiled code in Truffle, we'll pick "No" here.
That's it! Now you just need to confirm that you're not a robot and click the blue "Verify and publish" button at the bottom. Hopefully, after a few seconds of processing, you'll be greeted by a message like this:
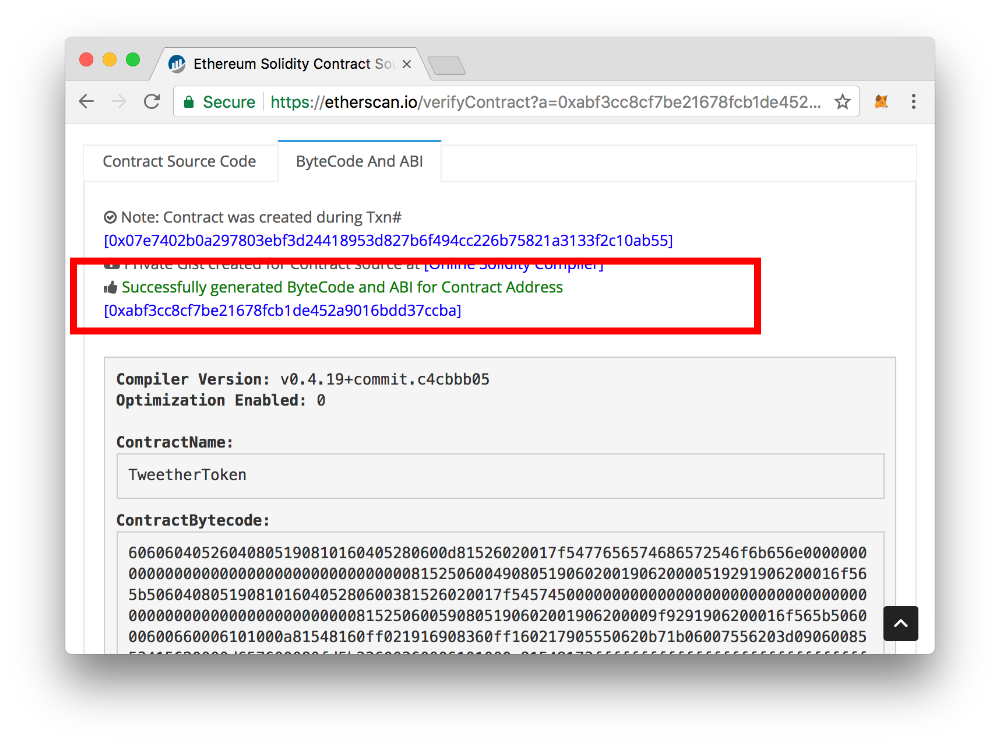 Success!
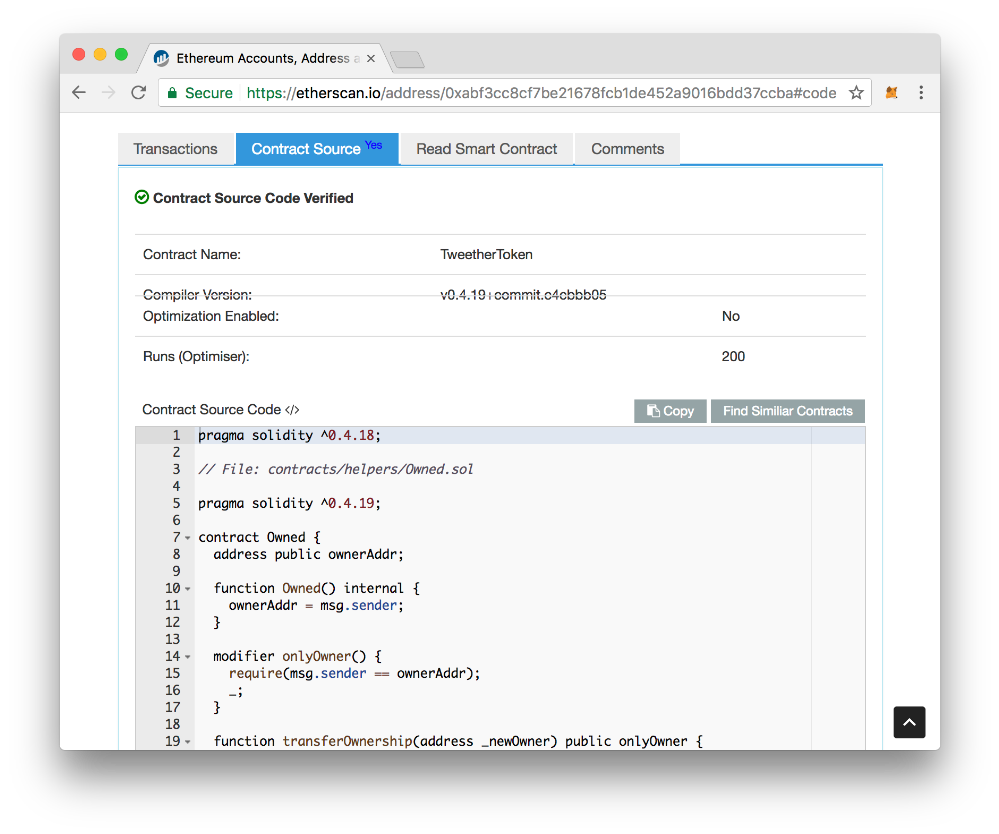
And if you go back to the contract's page again, you'll see that there's are two new tabs that you can click on: "Contract Source" and "Read Smart Contract".
Deploying the frontend
In addition to releasing your smart contracts, you'll also want to deploy your frontend to a server that everyone can access. If you use Next.js, like we did in this tutorial, there are several solutions for this.
One of my favourite services for deploying apps quickly is Heroku. To deploy a Next.js app to it, you need to first make sure that you have a Heroku account (don't worry, it's free) and download the Heroku CLI.
Next, you'll want to add two new scripts in your package.json file that Heroku can use to build and launch your app correctly:
// package.json
{
// ...
"scripts": {
// ...
"prestart": "npm run artifacts && next build client",
"start": "next start client -p $PORT"
},
// ...
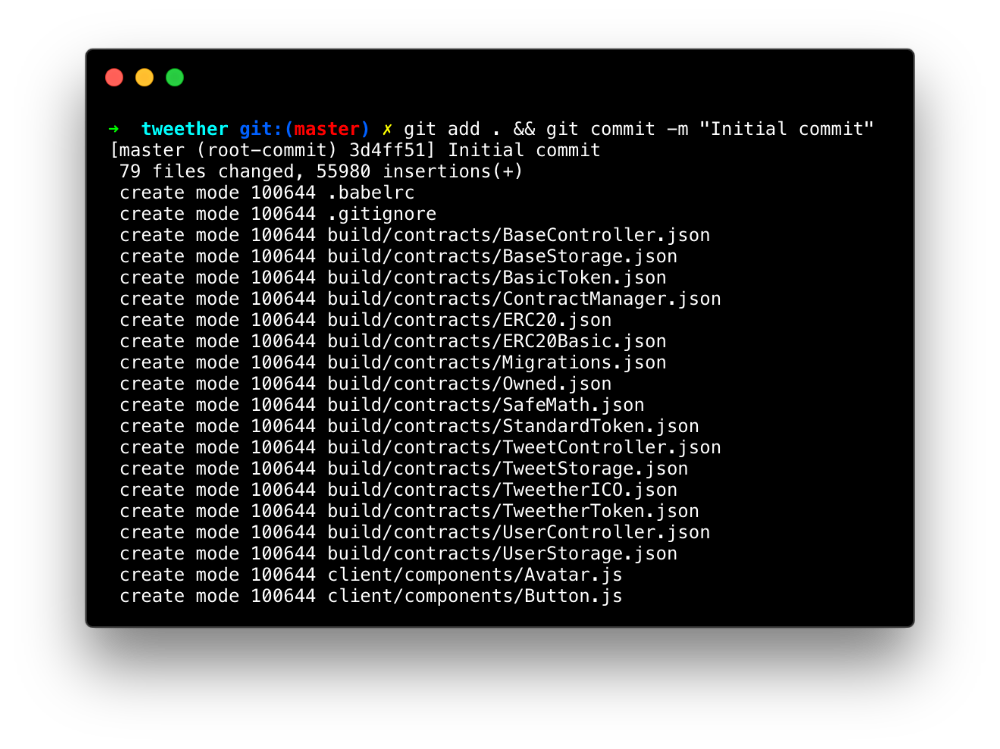
}We also need to make sure that our project is a git repo, so if it's not already, you can initialise it by running git init.
You'll probably want to add a .gitignore file to your project so that unnecessary files aren't messing with your build. Here's the one that I use (note that the build folder has not been added to it, since we want to keep a record of where our contracts have been deployed).
// .gitignore

node_modules
*.DS_Store
client/.next/
Now we can make our initial commit:
We create our Heroku app using their command-line tool. Note that I'm calling my app tweether-app, but since Heroku app names need to be unique, you'll have to pick something else:
heroku create tweether-app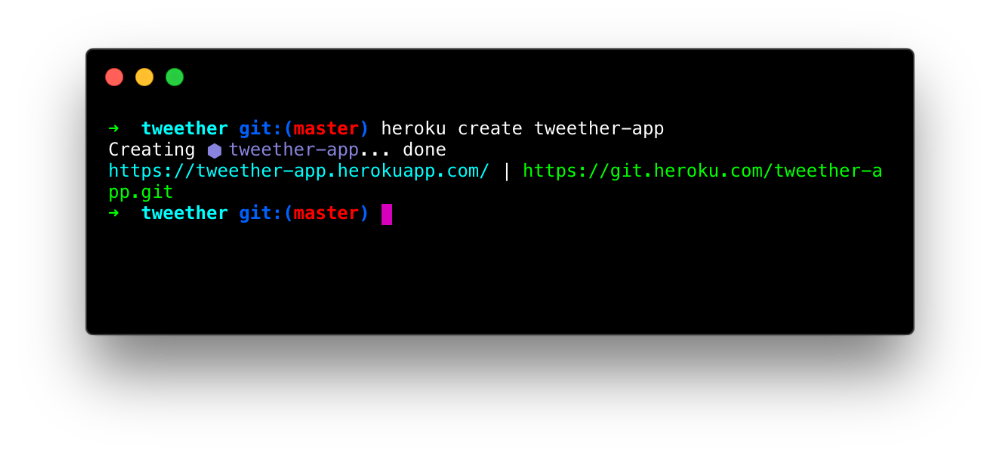
Finally, we deploy the app with git push heroku master!
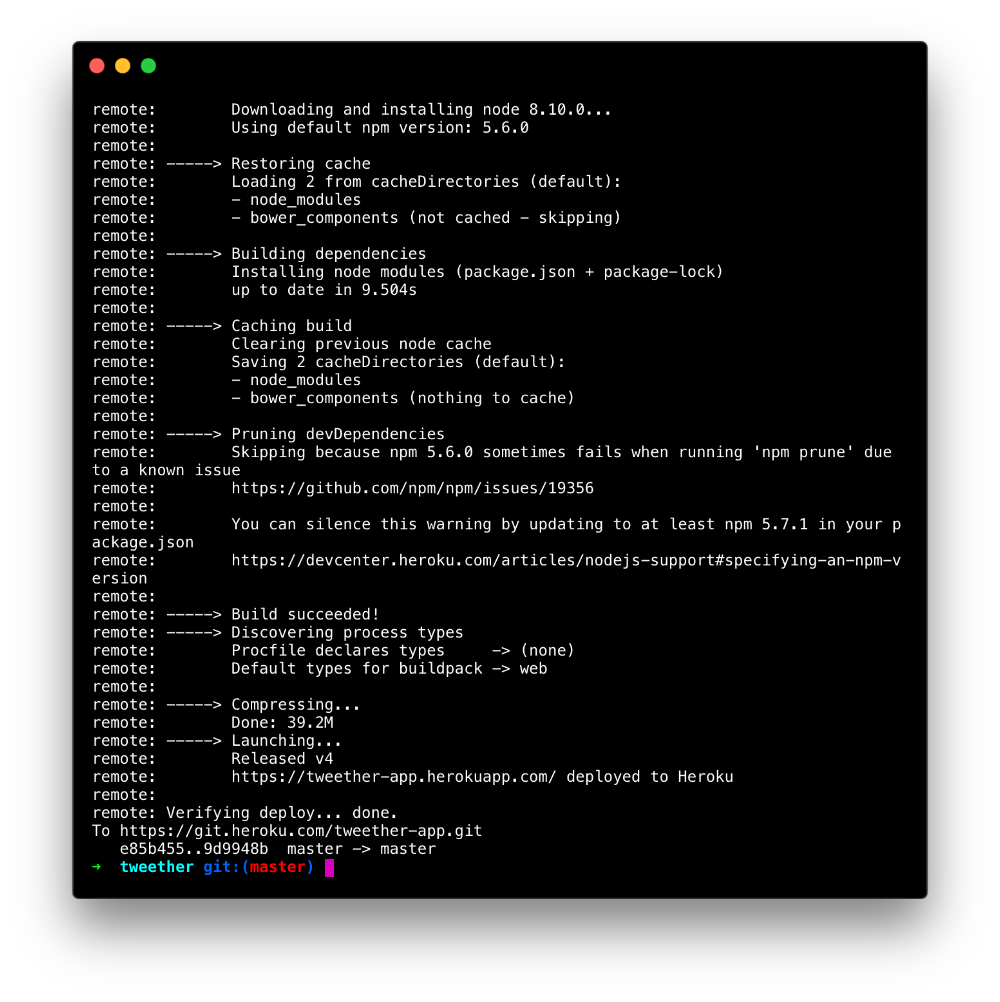 Voila!