In this chapter, we're going to make it possible for users to create new tweets straight from the web app. But first, we need to make some adjustments to our tweet contracts.
Polishing the Tweeting contracts
Right now, the createTweet function in our TweetController contract simply takes a parameter called _userId to determine who the tweeter is:
function createTweet(uint _userId, string memory _text) public returns(uint) {
  ContractManager _manager = ContractManager(managerAddr);

  address _tweetStorageAddr = _manager.getAddress("TweetStorage");
  TweetStorage _tweetStorage = TweetStorage(_tweetStorageAddr);

  return _tweetStorage.createTweet(_userId, _text);
}
This is obviously not a very good security model, since we could just pass in anyone's ID. Instead, we want to deduce the user ID based on the sender's address.
For that, we're going to make a call to the UserStorage using the contract manager. The final code should look like this:
// contracts/tweets/TweetController.sol

pragma solidity ^0.5.10;

import '../helpers/BaseController.sol';
import '../ContractManager.sol';
import './TweetStorage.sol';
import "../users/UserStorage.sol";

contract TweetController is BaseController {

  function createTweet(string memory _text) public returns(uint) {
    ContractManager _manager = ContractManager(managerAddr);

    address _userStorageAddr = _manager.getAddress("UserStorage");
    UserStorage _userStorage = UserStorage(_userStorageAddr);

    // Get the user ID from the address
    uint _userId = _userStorage.addresses(msg.sender);

    // Make sure the user ID isn't null
    require(_userId != 0);

    address _tweetStorageAddr = _manager.getAddress("TweetStorage");
    TweetStorage _tweetStorage = TweetStorage(_tweetStorageAddr);

    return _tweetStorage.createTweet(_userId, _text);
  }

}
Now that that's changed, we obviously also need to update our integration test so that it calls the createTweet function with a single parameter.
// test/integration/tweets.js

// ...

contract('tweets', () => {

  it("can create tweet with controller", async () => {
    const controller = await TweetController.deployed()

    const tx = await controller.createTweet("Hello world!")

    assert.isOk(tx)
  })

  // ...

})
If we run the test now, we see that it... fails?
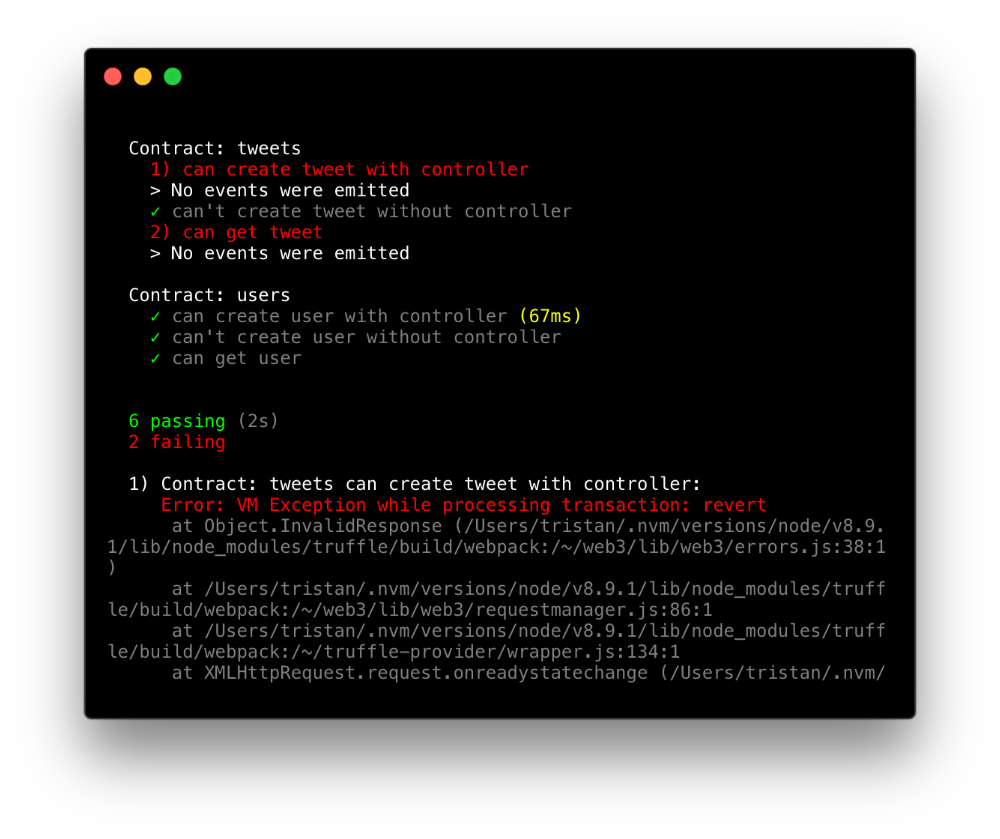
The reason for this is that a user with our address has not yet been created in the UserStorage, so when the integration test runs, it gets halted by the check we added (require(_userId != 0)).
We can fix this by creating the user in a new before() function, which runs before any test by convention:
// test/integration/tweets.js
// ...
const UserController = artifacts.require("UserController") // <-- Add this
const utils = require('../utils')
const { assertVMException } = utils
contract('tweets', () => {
// Add this hook:
before(async () => {
const userCtrl = await UserController.deployed();
const username = web3.utils.fromAscii("tristan")
const firstName = web3.utils.fromAscii("Tristan")
const lastName = web3.utils.fromAscii("Edwards")
await userCtrl.createUser(
username,
firstName,
lastName,
"I like building stuff",
"example@example.com"
);
});
it("can create tweet with controller", async () => {
// ...
})
// ...
})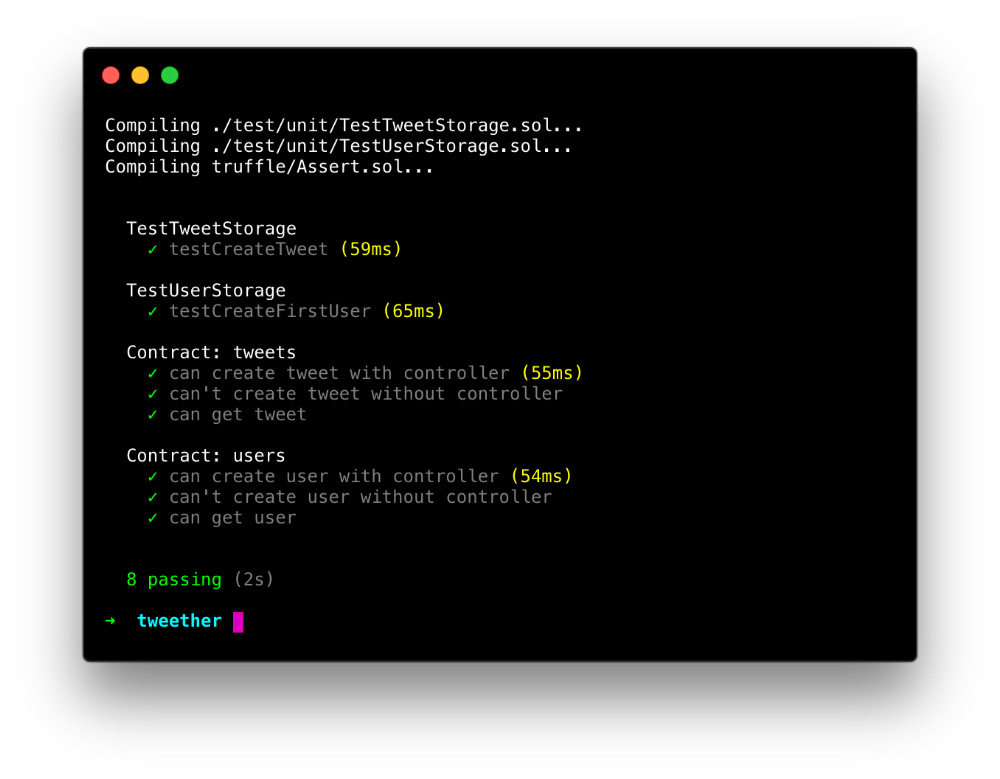 And now everything is fine again!
We also want to do a little change in the TweetStorage. In our DApp, we want to be able to go to a person's profile and see all their tweets. For this, we need some kind of list that stores all the tweets related to a user ID.
We're going to accomplish this by creating a new mapping (userTweetIds) that points a user ID to a list of tweetIds.
For some reason, this mapping does not generate a working getter even if we declare it as public (you're welcome to try it yourself). We'll therefore instead add an explicit getter function called getTweetIdsFromUser that fetches the list of tweet IDs based on a user ID.
// contracts/users/TweetStorage.sol

// ...

contract TweetStorage is BaseStorage {

  mapping(uint => Tweet) public tweets;
  mapping (uint => uint[]) userTweetIds; // <-- Add this line

  // ...

  function createTweet(uint _userId, string memory _text) public onlyController returns(uint) {
    latestTweetId++;

    tweets[latestTweetId] = Tweet(latestTweetId, _text, _userId, now);
    userTweetIds[_userId].push(latestTweetId); // <-- And this line

    return latestTweetId;
  }

  // ...and this getter function:
  function getTweetIdsFromUser(uint _userId) view public returns(uint[]) {
    return userTweetIds[_userId];
  }

}
Again, we need to make sure that this works as expected, so in our integration test file, we add a new test at the very end:
// test/integration/tweets.js
// ...
contract('tweets', () => {
// ...
it("can get all tweets IDs from user", async () => {
const storage = await TweetStorage.deployed()
const userId = 1
const ids = await storage.getTweetIdsFromUser.call(userId)
const expectedTweetId = 1
assert.isOk(Array.isArray(ids))
assert.equal(ids[0], expectedTweetId)
})
})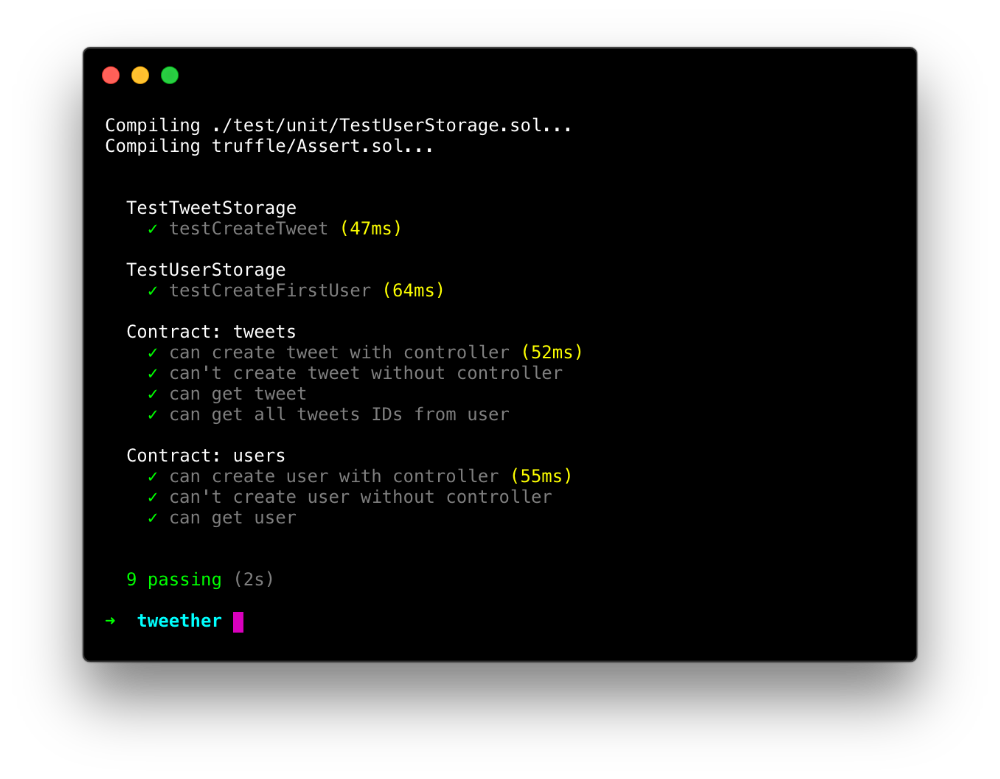 All good!
Automating some processes
Since we've updated one of our (normally immutable) storage contracts, we again need to redeploy all of our contracts. This time though, instead of stopping our running testrpc and spawning a brand new blockchain, we will simply use the truffle migrate command with the special --reset option. That way, even if the contracts have already been deployed before, Truffle will run all the migrations from scratch and upload the contracts to brand new addresses.
We'll also need to copy the new artifact files to the client folder. Since it's getting a bit tedious to perform these steps whenever we want to test out some new contract features, let's see how we can automate the process!
In our package.json file, we'll tweak the dev script so that it always runs our migrations from scratch, copies the artifacts, and finally starts the frontend server.
// package.json

{
  // ...
  "scripts": {
    "dev": "truffle migrate --reset && npm run artifacts && next client",
    // ...
  },
  // ...
}
Now, you can just re-run npm run dev whenever you want to test the latest contract changes in the web app, without worrying about what's already been deployed.
It can also be handy to have a script that automatically refills your MetaMask wallet with some ether, in case your ganache-cli instance gets restarted.
For this we'll add a new script called fund-metamask, which simply runs the same one-liner we used previously inside the Truffle console to fund our MetaMask wallet.
// package.json

{
  // ...
  "scripts": {
    "fund-metamask": "truffle exec ./fund-metamask.js",
    // ...
  },
  // ...
}
The JavaScript file (fund-metamask.js) needs to have a single module.exports function according to Truffle's documentation. The rest is pretty much the same as we did before manually, except that we call a callback function at the end to indicate that the transaction is done.
// fund-metamask.js

const receiver = "YOUR_ADDRESS";
const amount = web3.utils.toWei("10", 'ether');

module.exports = async function(callback) {
  const addresses = await web3.eth.getAccounts()

  web3.eth.sendTransaction({
    from: addresses[1],
    to: receiver,
    value: amount
  }, callback)
}
There we go. Although you might not need it now, it's nice to know that you can run npm run fund-metamask to quickly fill up your MetaMask account in the future.
Alright, let's try running npm run dev in another window. Hopefully, you'll see all your scripts being executed on after the other, with this showing at the end:
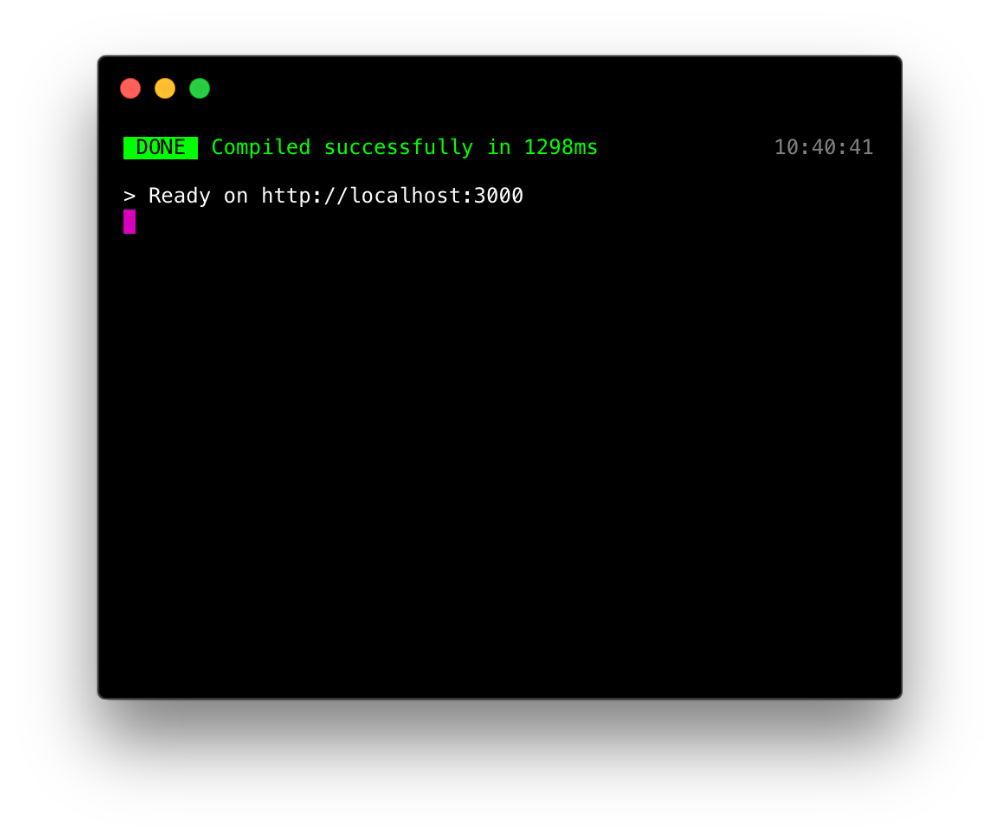
That certainly saves us some time!
Creating a tweet from the DApp
Let's go back to the frontend. The first step is to display a "Compose"-button in the navigation bar, which should bring up our tweeting modal.
For this, we simply import the SVG icon we want and wrap it in a button next to our name:
// client/components/Nav.js

// ...

import ComposeIcon from "../icons/compose.svg" // <-- Import the icon

// Add the "toggleComposeModal" parameter:
export default ({ userInfo, toggleComposeModal }) => {

  // ...

  return (
    <nav>
      {/* Add the button: */}
      <button onClick={toggleComposeModal}>
        <ComposeIcon />
      </button>

      <Link href={`/profile?u=${username}`}>
        {/* ... */}
      </Link>

      <style jsx>{/*
        ...
      */}</style>
    </nav>
  )
}
The toggleComposeModal method simply toggles a state variable, which determines if our modal is rendered or not. We'll use the same Modal component that we're using for the registration form.
// client/components/Header.js

// ...

import Modal from "./Modal" // <-- Add this line

export default class Header extends React.Component {
  state = {
    loggedIn: false,
    userInfo: {},
    showComposeModal: false, // <-- Add this state variable
  }

  // Add this method:
  toggleComposeModal = () => {
    const { showComposeModal } = this.state

    this.setState({
      showComposeModal: !showComposeModal,
    })
  }

  // ...

  render() {
    // Add "showComposeModal":
    const { loggedIn, userInfo, showComposeModal } = this.state

    // ...

    return (
      <header>
        <Center>
          {/* ... */}

          {loggedIn && (
            <Nav
              userInfo={userInfo}
              toggleComposeModal={this.toggleComposeModal} {/* <-- Add this */}
            />
          )}
        </Center>

        {showComposeModal && (
          <Modal
            onClose={this.toggleComposeModal}
          >
            Create a tweet!
          </Modal>
        )}

        {/* ... */}
      </header>
    )
  }
}
That's a good start! Now we just need to fill the modal with its actual elements. For that, we'll create a new component called TweetComposer:
// client/components/TweetComposer.js

import { createTweet } from '../web3/tweets'
import Button from './Button'

export default class ComposeModal extends React.Component {
  state = {
    text: "",
  }

  handleChange = e => {
    this.setState({
      text: e.target.value,
    });
  }

  post = async () => {
    const { text } = this.state
    const { onClose } = this.props

    await createTweet(text)

    alert("Your tweet was posted!")

    onClose()
  }

  render() {
    const { onClose } = this.props
    const { text } = this.state

    const disabled = (text === "")

    return (
      <div>
        <h3>
          Post a new tweet
        </h3>

        <textarea
          value={text}
          onChange={this.handleChange}
          maxLength={140}
        />

        <Button
          onClick={this.post}
          disabled={disabled}
          style={{
            marginTop: 12,
            float: 'right',
          }}
        >
          Post tweet
        </Button>

        <style jsx>{`
          textarea {
            box-sizing: border-box;
            margin: 0px;
            margin-top: 10px;
            border: 2px solid rgba(107,108,139,0.58);
            border-radius: 7px;
            width: 100%;
            padding: 11px;
            font-size: 16px;
          }
          textarea:focus {
            outline: none;
          }
        `}</style>
      </div>
    )
  }
}
This component uses typical React behaviour to let the user type in a textarea using state variables. As you can see, we use the createTweet action from our web3/tweets.js-file to post the tweet. This function needs to be slightly modified though, since the ABI for the TweetController contract has been modified since we wrote it. It now takes a single parameter (the tweet text) instead of two:
// client/web3/tweets.js

// ...

export const createTweet = async (text) => {

  // ...

  const result = await controller.createTweet(text, {
    from: addresses[0],
  })

  return result
}

// ...
And finally, we render the TweetComposer inside of our Modal:
// client/components/Header.js

// ...

import TweetComposer from "./TweetComposer" // <-- Add this line

export default class Header extends React.Component {
  // ...

  render() {
    // ...

    return (
      <header>
        {/* ... */}

        {showComposeModal && (
          <Modal
            onClose={this.toggleComposeModal}
          >
            {/* And this: */}
            <TweetComposer onClose={this.toggleComposeModal} />
          </Modal>
        )}

        {/* ... */}
      </header>
    )
  }
}
That's it! Now click the tweet button, write something nice and pat yourself on the back!