So far, we've created 2 out of the 3 pages we need: Home and Profile. In this chapter, we're going to start on the third one: the Login page.
Creating the design
Let's take a look at what it is we're aiming for:
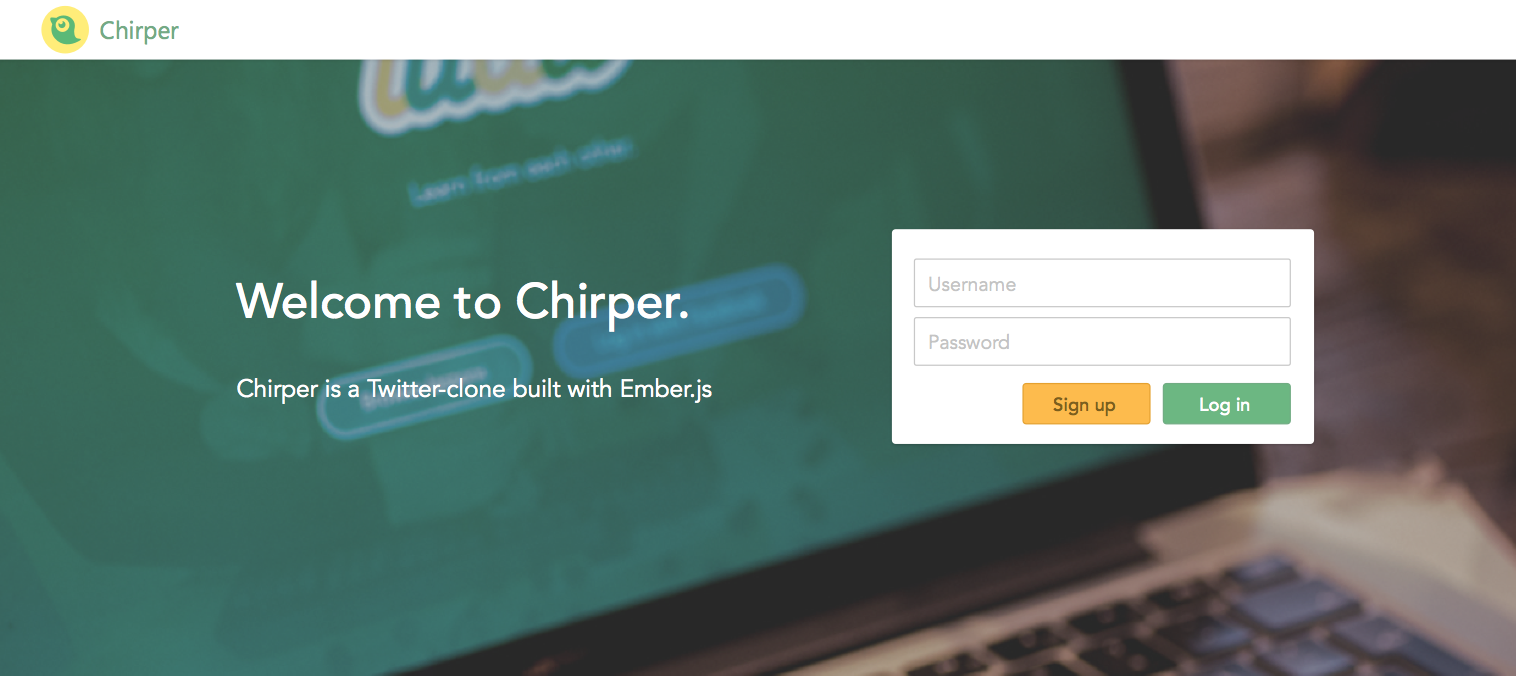 From our Sketch-file.
Looks simple enough, let's start coding! We'll start by generating the index route:
ember g route index{{! app/index/template.hbs }}
<div class="page-container index">
<div class="text-wrapper">
<h1>Welcome to Chirper.</h1>
<p class="tagline">Chirper is a Twitter-clone built with Ember.js</p>
</div>
<div class="login-box">
{{input placeholder="Username" value=username }}
{{input type="password" placeholder="Password" value=password }}
<button class="signup">Sign up</button>
<button class="login">Log in</button>
</div>
</div>Notice how we're setting value=username and value=password as new variables in our markup by not having quotes around them. By doing this, we will then be able to fetch the values in our controller-file with this.get('username') and this.get('password').
And as usual with our routes, we create a corresponding CSS to it to make it look good:
// app/styles/index.scss

html, body {
  height: 100%;
}

body.landing-page {
  background-image: url("/images/landing-photo.jpg");
  background-size: cover;
  background-position: center center;
}

.page-container.index {
  margin-top: 200px;
  width: 940px;

  .text-wrapper {
    float: left;
  }

  h1 {
    font-size: 40px;
    color: white;
    line-height: 55px;
    font-weight: 500;
    margin-top: 30px;
  }

  p.tagline {
    font-size: 19px;
    color: white;
    line-height: 27px;
    margin-top: 20px;
  }

  .login-box {
    background: white;
    box-shadow: 0px 1px 2px 0px rgba(0,0,0,0.21);
    border-radius: 3px;
    float: right;
    padding: 20px;
    width: 346px;
    text-align: right;
  }

  button {
    margin-top: 10px;
  }
}
// app/styles/app.scss
@import "layout";
@import "ui";
@import "header";
@import "profile";
@import "index"; // <-- Add this line!
@import "pod-styles";Finally, in order to make the CSS work, we want the page's body-tag to have a certain class ("landing-page") only when the user visit the index page.
In order to achieve that, we're going to install an addon called ember-body-class:
ember install ember-body-classRestart the server, then open the route file and add this classNames line:
// app/index/route.js

import Ember from 'ember';

export default Ember.Route.extend({
  classNames: ["landing-page"],
});
If you visit http://localhost:4200, you should now see the same design as in our mockups.
Adding controller actions
Since we don't have a real backend API we won't be able to add real authentication yet, but we can simulate it for now!
On the index page, we want the user to be able to log in with the username "letme" and the password "in", and then be sent to the Home-page. In all other cases, an error message will be shown.
Whenever we want to add actions like these on route templates, we need a controller, so let's generate one!
ember g controller indexWe'll start by binding a very simple action to the login-button:
{{! app/index/template.hbs }}

<button class="login" {{action 'login'}}>Log in</button>
// app/index/controller.js
import Ember from 'ember';
export default Ember.Controller.extend({
actions: {
login: function() {
var username = this.get('username');
var password = this.get('password');
if (username === 'letme' && password === 'in') {
this.transitionToRoute('home');
} else {
sweetAlert('Oops!', 'Wrong username or password!', 'error');
}
}
}
});Going back to the browser, you should now be able to (fake) log in with the username "letme" and the password "in".
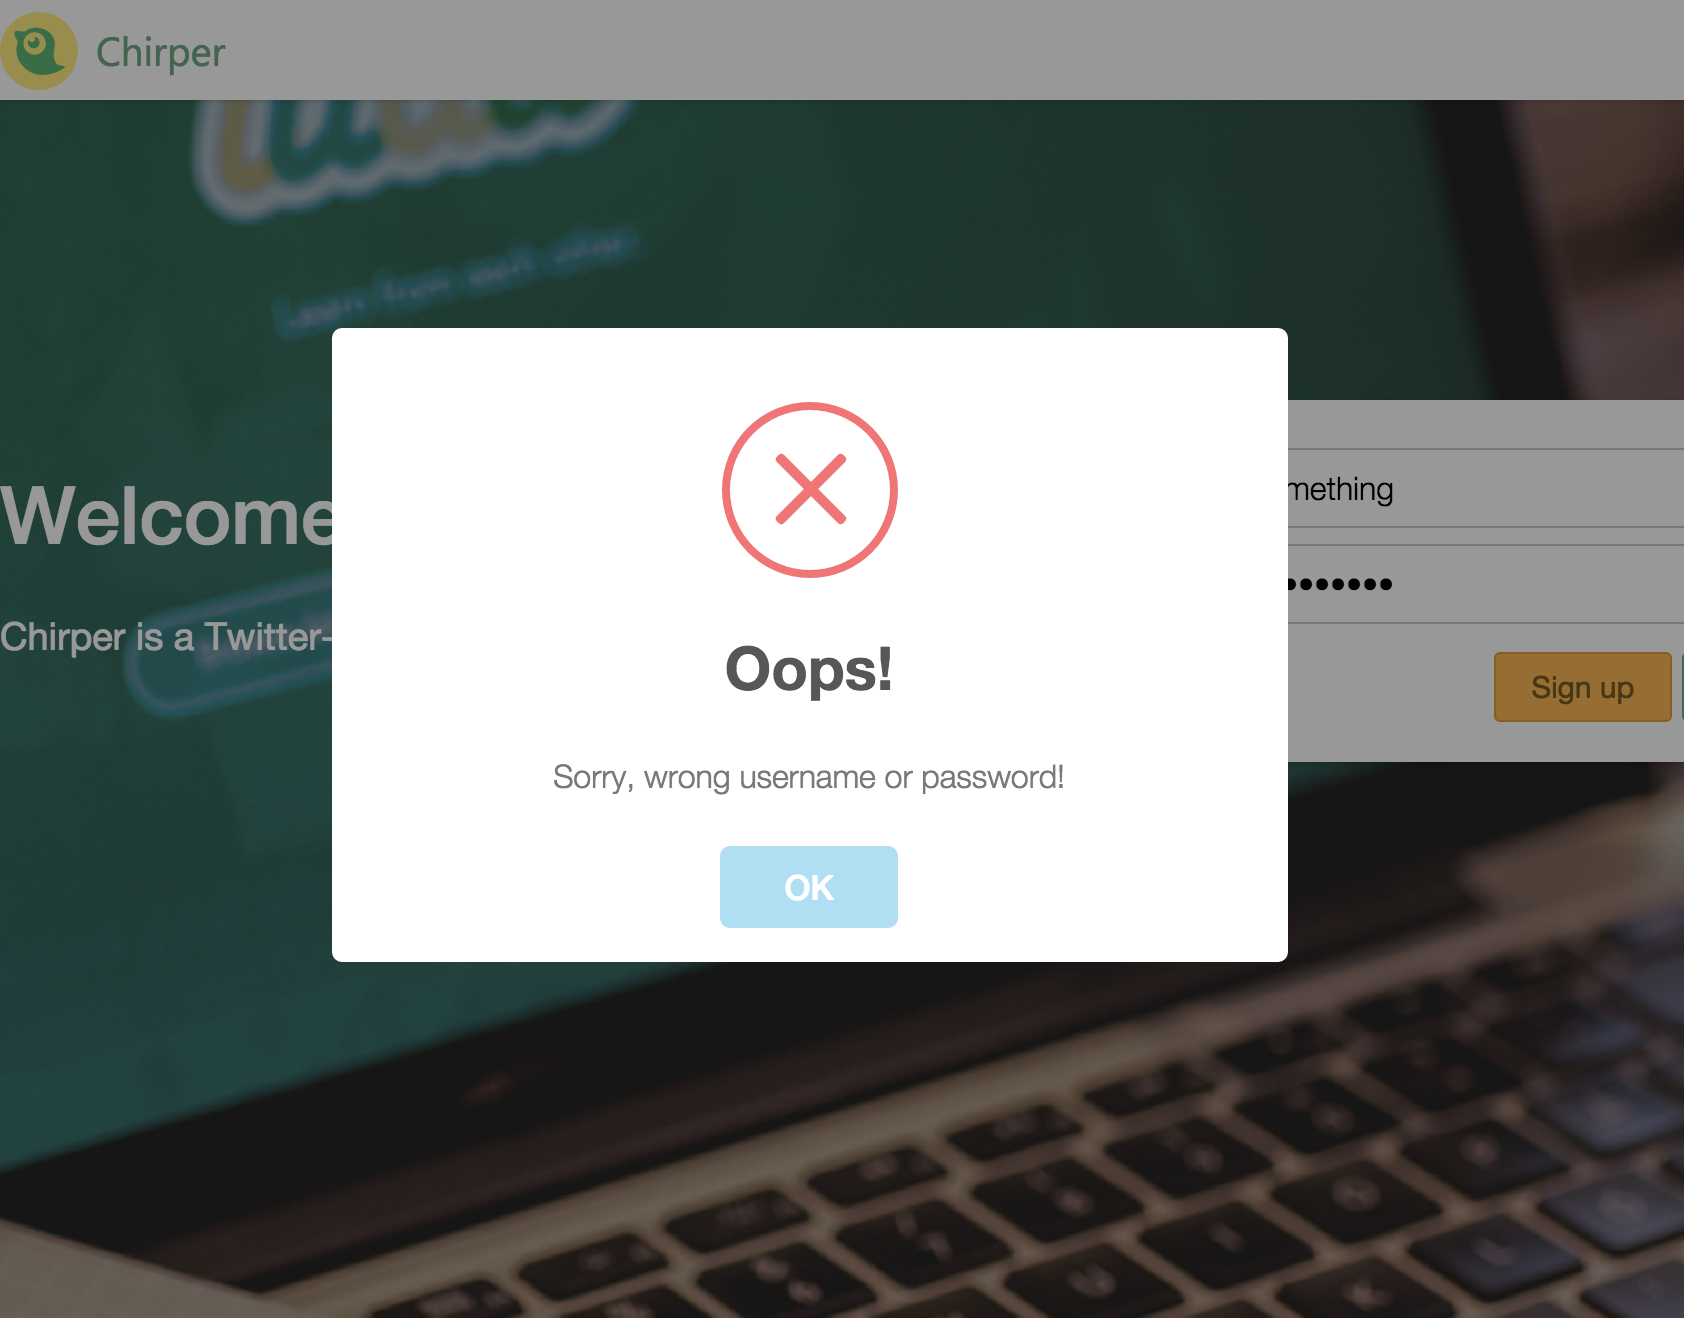 And if you type in something other than "letme" and "in", you should see this SweetAlert.
This works well, but that error message is a little too intrusive, we can make it more discrete!
What we'll do is render a certain tag containing the error message depending on if the variable errorMessage is set or not (this is similar to what we did in the Templating with HTMLBars chapter).
// app/index/controller.js

if (username === 'letme' && password === 'in') {
  this.transitionToRoute('home');
} else {
  // We replace our SweetAlert-function with a simple variable containing the error message
  this.set('errorMessage', 'Wrong username or password!');
}
Then we put the error message right on top of the input fields, and make sure it only renders if it's set:
{{! app/index/template.hbs }}
{{#if errorMessage}}
<p class="error">{{errorMessage}}</p>
{{/if}}
{{input placeholder="Username" value=username }}
{{input type="password" placeholder="Password" value=password }}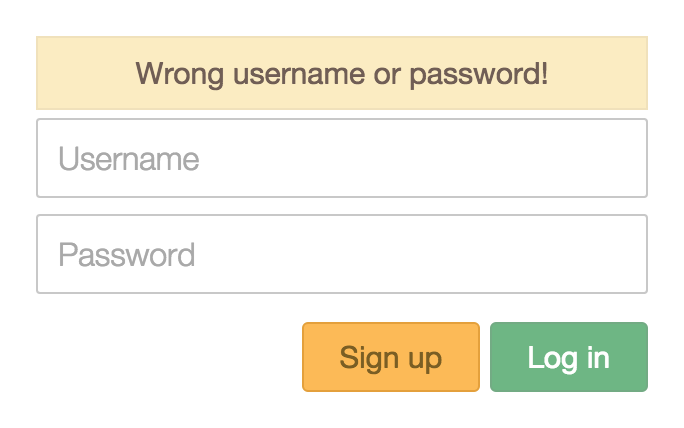 The new error message!
There's a new problem now though: the error message never disappears! We want to hide it as soon as you start changing the username or password again.
Don't worry, thanks to the fact that we have variables for the username, the password and the errorMessage, this is very simple to do. We only need to observe any changes to the username and password variables and, when any of them change, set errorMessage to false to "unrender" it:
// app/index/controller.js

valuesChanged: Ember.observer('username', 'password', function() {
  this.set('errorMessage', false);
}),

actions: {
  // ...
That's it! You now know the basics of connecting variables to user inputs, and rendering error messages (or other types of messages) depending on what the input is.
We will revisit this page later once we have a real API set up. But first, in the next chapter, we're going to use the Liquid Fire-library to add some subtle animations to our app!