What is Ember Data?
Ember Data is a library that comes bundled with Ember CLI, and helps you manage the data of your app.
When you think of "data", you might instinctively be reminded about databases or ORMs. But remember that Ember is a front-end only framework, and that goes for Ember Data as well. It makes no direct contact with any database whatsoever.
So what does it do? In a nutshell, Ember Data stores your models in the browser's local storage, pulls them out when you need them and sends AJAX requests that are based on a set of conventions for REST APIs.
Don't worry if the words above sound really confusing right now, we're going to take it one bit at a time in this chapter!
Creating our models
Let's first ask ourselves: what data do we actually need in our app? In Chirper, there are really only two things we have to store and retrieve:
-
Users
-
Chirps
Seems easy enough. Let's start with the User model:
ember g model userWe'll make it very simple for now and say that a user only consists of four things: a username, the **number of chirps **(that the user has written), the number of followers, and the number of followings. Open the generated model-file and add the following attributes:
// app/user/model.js

import DS from 'ember-data';

export default DS.Model.extend({
  username: DS.attr('string'),
  numberOfChirps: DS.attr('number'),
  numberOfFollowing: DS.attr('number'),
  numberOfFollowers: DS.attr('number')
});
As you can see, we use DS.attr() to specify the data type of the model attributes. You can find all the available types in the Ember Data Documentation.
Installing Ember CLI Mirage
Alright, so we have a model, but we still don't have any actual data. Normally, this data should come from a server-side JSON API, but for now, we want to keep our project front-end only in order to keep experimenting and making quick iterations.
Luckily, we can actually add fake data for now by using a great add-on called ember-cli-mirage. So let's install it!
ember install ember-cli-mirage@0.1.13Restart your Ember server after the installation is done. Now you should see a new folder: app/mirage. This is where we will put all of our mock data.
Alright, now let's specify how Ember Data should behave in order to fetch our mock data. First of all, we will specify what kind of requests Ember should make, and how the returned data is formatted. This is specified through an adapter. For this tutorial, we're going to use Ember's simple and predefined RESTAdapter throughout the whole application, so let's generate that:
ember g adapter applicationIn the adapter.js file, we specify that it is a RESTAdapter we want, and also that we want all data request URLs to be prefixed with /api (otherwise they might collide with our existing route URLs):
// app/application/adapter.js

import DS from 'ember-data';

export default DS.RESTAdapter.extend({
  namespace: 'api'
});
This prefix will also need to be specified in our mirage config.js file:
// app/mirage/config.js

export default function() {
  this.namespace = 'api';
}
Okay, so we have a model and we've specified our adapter. Now, we just need to tell Ember when and where in our app we want this data to be loaded.
Fetching mock data
In our case, we want to load the user data as soon as the "home"-screen is launched, and then populate the profile-glance component with that data. This is what the route.js-files are for: besides connecting to a URL, they also sets up the initial state of the page they correspond to.
When retrieving a data record for a route, we use this.store.findRecord(), where the first argument is the name of the model and the second argument is the id of the recordthat we want to load. So in the code below, we're loading the user with id 1 and assigning it to the user-key:
// app/home/route.js

import Ember from 'ember';

export default Ember.Route.extend({
  model: function() {
    return Ember.RSVP.hash({
      user: this.store.findRecord('user', 1)
    });
  }
});
If we go back to the browser now you should see a blank page. Uh-oh!
![]() Don't worry, this is normal!
Don't worry, this is normal!
Let's bring up the JavaScript console (View → Developer → JavaScript Console) and check if we can see what happened:
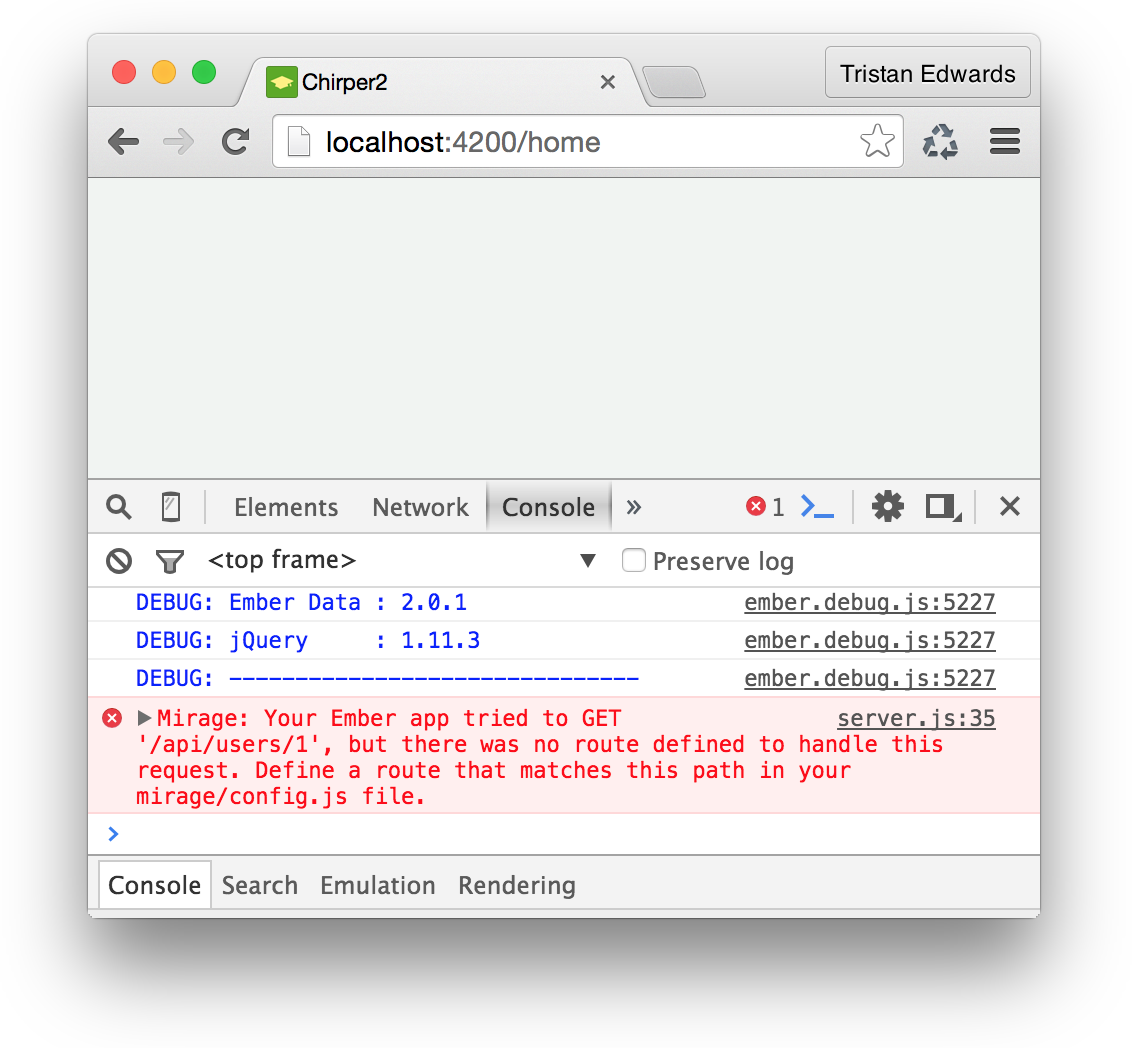 Aha!
Aha!
As you can see, Ember is doing the right thing, trying to fetch some data from our mock server by making a request to /api/users/1. The problem is that we haven't defined our mock data yet, so let's do that now!
We're going to use fixtures for our mock data, so the first thing you need to do is delete the folder app/mirage/scenarios. Then we'll create a folder called fixtures in our new mirage-folder, and in it we'll create a file called users.js:
// app/mirage/fixtures/users.js

export default [
  {
    id: 1,
    username: 't4t5', // Put your username here
    numberOfChirps: 2,
    numberOfFollowing: 5,
    numberOfFollowers: 5
  }
];
Finally, we specify the URL that we want to make available in the Mirage config-file. Ember CLI Mirage is smart enough to follow the RESTAdapter's conventions and will return the requested user automagically through one simple line of code!
// app/mirage/config.js
export default function() {
this.namespace = 'api';
this.get('/users/:id'); // <-- Add this line
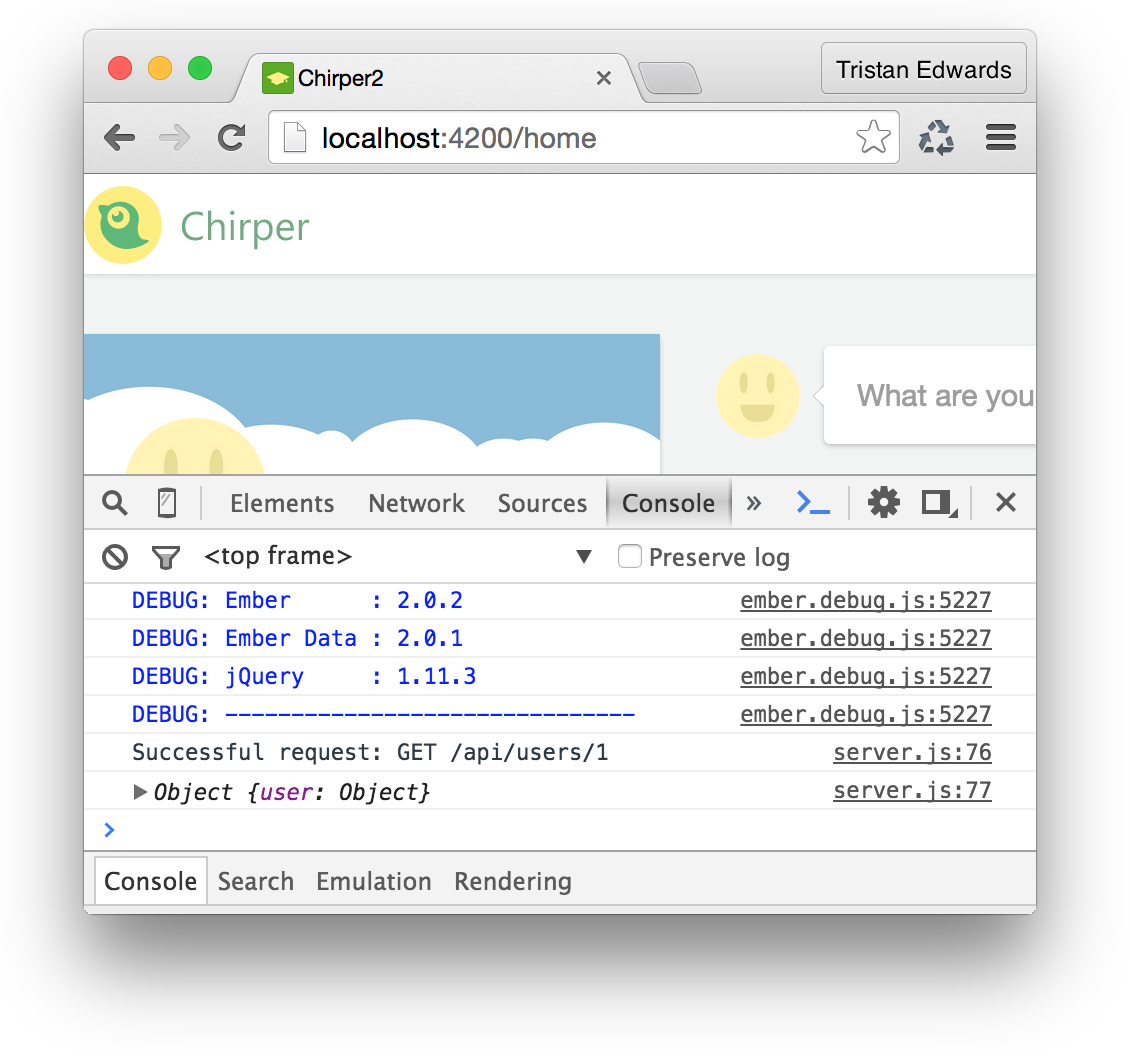
};Now go back to the browser, and the page should work as usual again, with a console message informing you that the request was successful!
Although the console log tells us that our model is loaded now, there's no way for us to really see it on the page. Let's open our "home"-template and try to print out the username of the user we loaded:
{{! app/home/template.hbs }}
<aside class="left">
<p>{{model.user.username}}</p> <!-- new code -->
{{profile-glance}}
</aside>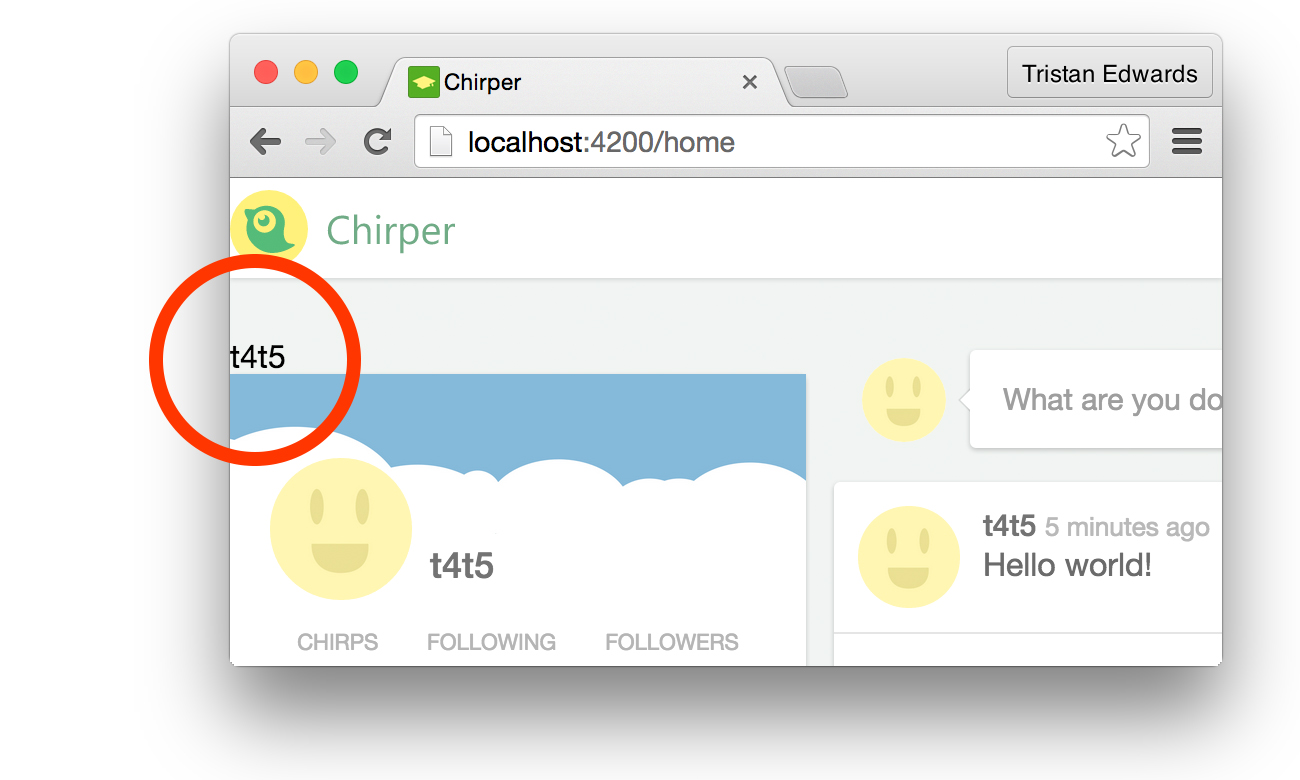 Yay! It works!
Passing the data to our component
We now know that our data fetching works, but it's rendering on the wrong place, so let's remove the markup we just added to the template page. We want the data to be rendered inside of the profile-glance-component instead!
One thing we didn't mention in the last chapter is that you can actually pass data downto your components by adding attributes to it. Let's see how that works!
{{! app/home/template.hbs }}

{{! Here we add an attribute called "user" to our "profile-glance"-component and set its value to the data loaded from the route }}
<aside class="left">
  {{profile-glance user=model.user}}
</aside>
{{! app/components/profile-glance/template.hbs }}
{{! Now, we have access to all that data through the "user"-key }}
<div class="cover-photo"></div>
<img class="avatar" src="/images/avatar.jpg" />
{{#link-to "user"}}
{{user.username}} <!-- here -->
{{/link-to}}
<ul class="profile-stats">
<li>
<h4>Chirps</h4>
<p>{{user.numberOfChirps}}</p> <!-- ...here -->
</li>
<li>
<h4>Following</h4>
<p>{{user.numberOfFollowing}}</p> <!-- ...here -->
</li>
<li>
<h4>Followers</h4>
<p>{{user.numberOfFollowers}}</p> <!-- ...and here -->
</li>
</ul>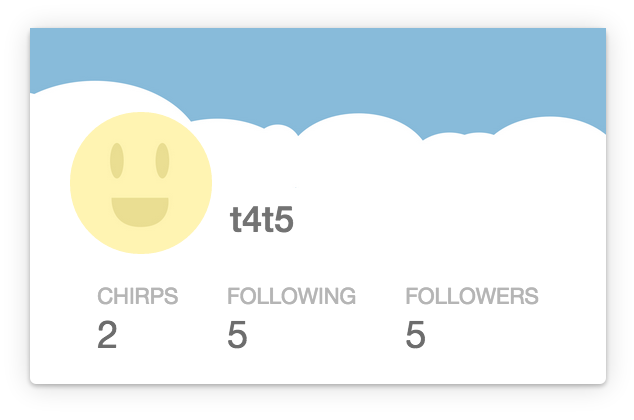 It works!
Adding the chirp-data
Alright, now that you have a rough understanding of how data is passed down, let's also replace our static list of chirps with mock data!
We want this to be populated with fixture data!
ember g model chirpLet's structure the model. We'll say that a chirp contains: a text, a user (the author) and the date it was posted.
// app/chirp/model.js

import DS from 'ember-data';

export default DS.Model.extend({
  text: DS.attr('string'),
  user: DS.belongsTo('user'),
  createdAt: DS.attr('date')
});
Here we stumble on a new kind of attribute: we've added a one-to-one relationshiplinking a chirp with its user (the author) through DS.belongsTo('user'). The only data we need then is the id of the user (which in this case is 1).
This is one of those awesome things with Ember Data; it not only stores your models but also remembers how they're linked together. We're going to take advantage of that in the upcoming chapters.
Let's not forget to add our mock data, so let's create a chirps.js-file in the fixtures-folder:
// app/mirage/fixtures/chirps.js

export default [
  {
    id: 1,
    text: "Hello world!",
    user: 1,
    createdAt: new Date('2015-06-08T09:30:26')
  },
  {
    id: 2,
    text: "Hello again!",
    user: 1,
    createdAt: new Date('2015-06-08T09:30:27')
  },
];
Since we want to fetch all these chirps, we'll add the following line to the app/mirage/config.js-file (right after the one that fetches the user):
// app/mirage/config.js

this.get('/chirps');
Now that we have the structure and data of our chirps ready, let's follow the same process as we did for the user data:
-
Fetch the data via the
home-route -
Pass the data down to the component that renders the list
-
Render the data by doing some small edits to the Handlebars-template
If you feel adventurous, you could try passing down the data and render it on your own and then come back to this lesson to see how you did!
Alright, let's get to it. We'll start by fetching the data in the same route (home) as the one we used before:
// app/home/route.js

return Ember.RSVP.hash({
  user: this.store.findRecord('user', 1),
  chirps: this.store.findAll('chirp') // This is the line you need to add
});
Next, we pass the data down to our chirps-list-component under the key chirps.
{{! app/home/template.hbs }}

<main>
  {{status-update}}
  {{chirps-list chirps=model.chirps}} {{!-- Pass it down --}}
</main>
Then, we loop over the data one record at a time using each as (if you are a Ruby developer you'll probably recognize this syntax). This allows us to get a separate chirp-variable for every record.
The data of each chirp-record is then passed down one step further to the chirps-list/chirp-message-component: that's where we'll actually render the data!
{{! app/components/chirps-list/template.hbs }}
{{#each chirps as |chirp|}}
{{chirps-list/chirp-message chirp=chirp}}
{{else}}
<div class="no-chirps">
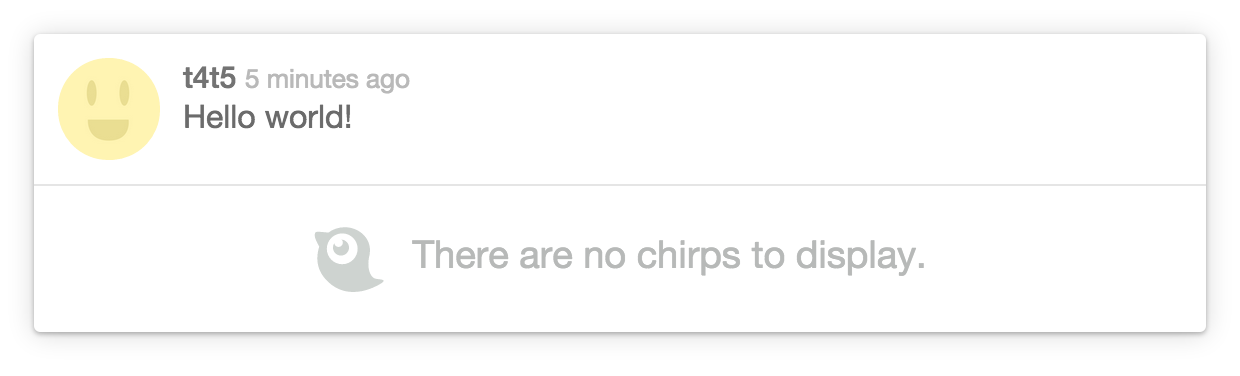
<div class="icon"></div>
<p>There are no chirps to display.</p>
</div>
{{/each}}Notice that we have an else-statement in our each. This is a nifty Handlebars-feature: the else-part will only be rendered if the list we're looping over is empty!
Now there's only the easy part left: replace the static data in the chirps-list/chirp-message-component with the data we're passing down:
{{! app/components/chirps-list/chirp-message/template.hbs }}

<img class="avatar" src="/images/avatar.jpg" />
<div class="info">
  {{#link-to 'user'}}
    {{chirp.user.username}}
  {{/link-to}}
  <time>{{chirp.createdAt}}</time>
  <p>{{chirp.text}}</p>
</div>
Notice how good it is that we defined that one-to-one relationship earlier?
Instead of passing down two separate data-sets of a chirp and a user, we only need to pass down the chirp object. We can still access the username-attribute from the user model by typing chirp.user.username. Super simple!
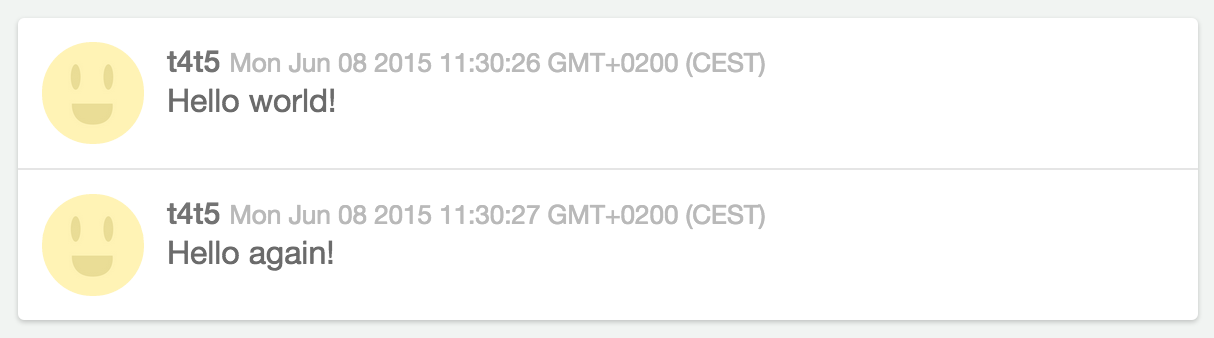 Go back to the browser. There's our data!
Great! There are just two noticeable things to fix:
-
That raw timestamp is ugly, the time should be relative (e.g. "5 minutes ago"). Don't worry, this will be fixed in an upcoming chapter with an external library.
-
The order is wrong! If we want to simulate the way Twitter works, it should show the latest chirp ("Hello again!") before the first one ("Hello world!"). Let's fix that now!
In order to fix the order, we're going to create a computed property called sortedChirps(right after the classNames) which will sort out the array in the chirps-list-component.
// app/components/chirps-list/component.js

chirpsSorting: ['createdAt:desc'],
sortedChirps: Ember.computed.sort('chirps', 'chirpsSorting')
Now we can just edit our template so that it uses our new computed array instead of the old one:
{{! app/components/chirps-list/template.hbs }}

{{#each sortedChirps as |chirp|}}
  {{!-- (The rest is the same) --}}
Tada! We've got our data, and it's now sorted. Good job!
This is how you fetch and render your records with Ember Data. In the upcoming chapters we will also show you how to add, remove and edit records!
Our Home-page is starting to get a little lonely, so in the next chapter we'll put together everything we have learned so far by creating the profile page!